| HMS Seal (N37) | |
|---|---|
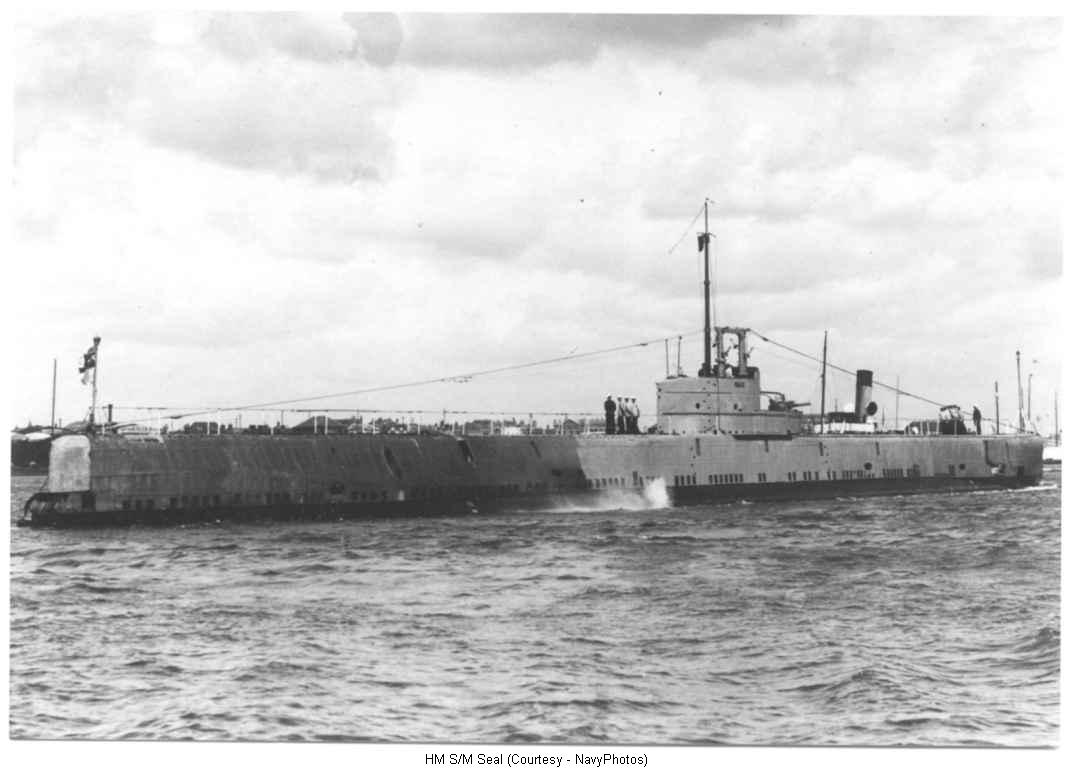 HMS Seal in 1939 | |
| Career (United Kingdom) | |
| Class and type: | Grampus-class submarine |
| Name: | HMS Seal |
| Builder: | Chatham Dockyard |
| Laid down: | 9 December 1936 |
| Launched: | 27 September 1938 |
| Commissioned: | 24 May 1939 |
| Fate: | captured by Germans, 5 May 1940 |
| Badge: | |
| Career (Nazi Germany) | |
| Name: | U-B |
| Acquired: | 1940 |
| Decommissioned: | 1941 |
| Fate: | Scuttled 1945. |
| General characteristics | |
| Displacement: |
1,810 tons surfaced 2,157 tons submerged |
| Length: | 293 ft (89 m) |
| Beam: | 25 ft 6 in (7.77 m) |
| Draught: | 16 ft 10 in (5.13 m) |
| Propulsion: | 2 shaft, Diesel (3300 hp) plus electric (1630 hp) |
| Speed: |
15.5 knots surfaced 8.75 knots submerged |
| Complement: | 59 |
| Armament: |
6 x 21 in torpedo tubes (bow) 12 torpedoes 1 x 4 inch deck gun 50 mines |

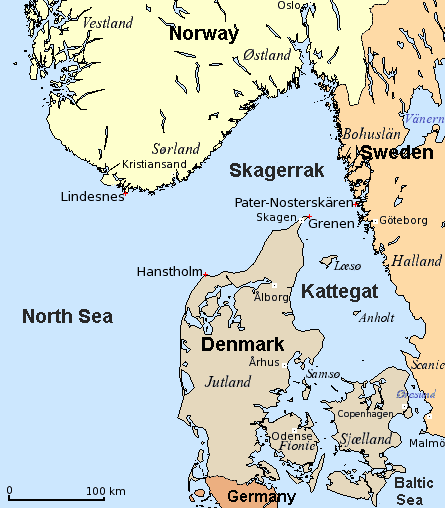
Kattegat and Skagerrak.
HMS Seal was one of six ships of the Grampus-class mine-laying submarines of the Royal Navy. She served in the Second World War and was captured by the Kriegsmarine and taken into German service as U-B. She was the only submarine the Germans captured at sea during World War II.
Seal was laid down at the Chatham Dockyard on 9 December 1936, launched on 27 September 1938 and commissioned into the Royal Navy on 24 May 1939. During her entire British career, her commander was Rupert Lonsdale, for whom it was his second command.
Early career[]
On being commissioned, Seal went for acceptance trials at Dartmouth and in Tor Bay. On the day of her first successful deep dive, 1 June 1939, news arrived of the loss of HMS Thetis undergoing trials at Liverpool, a personal setback for the crew who had lost many friends. Seal moved to Gosport to complete torpedo trials.[1]
On 4 August, she sailed to China to join HMS Grampus and Rorqual via Gibraltar, Malta and the Suez Canal. However, on the outbreak of the Second World War, she was detained at Aden and made two ad hoc patrols watching the Italians, whom it was feared might be towing German submarines while Italy was still not at war. She returned home, escorting a damaged destroyer in the Mediterranean. Back in the North Sea, she carried out one patrol near the Dogger Bank and received her first attack from German aircraft. She then augmented a convoy escort to Halifax, Nova Scotia, a 14-day crossing. She was back in time for Christmas leave and was based at Elfin, a temporary establishment at Blyth, Northumberland. She settled to a North Sea patrol routine as part of the Norwegian campaign being based at Rosyth. One night in February, Seal was given an extra set of personnel - an armed boarding party - and was assigned to take part in the hunt for the German tanker Altmark. However Seal played no part in the Altmark incident. Admiral Horton met Seal on one of her returns to Rosyth and commented, "You're too damn clean for a war-time boat. Something must be wrong". However, he revised his opinion when he reviewed the log-books to "you must have a damn good crew".[2]
By the beginning of April 1940, the Germans had invaded Norway, and Seal was operating off the Norwegian coast. Lonsdale decided to enter Stavangerfjord, a hazardous operation and reached the port of Stavanger using the novel Asdic equipment. There were four merchant ships in the harbour, but they all carried neutral flags; Lonsdale's requests to attack a seaplane base and land a shore party to sabotage the railway met with firm refusals; and the German naval craft they encountered had too shallow a draught for Seal's torpedoes to hit. The disappointed crew returned to Rosyth, narrowly escaping a torpedo attack at the same place and time as that in which HMS Thistle was lost.[3]
Loss in Kattegat[]
Having been at sea for a year, and suffering some damage from a close scrape with a merchant ship, Seal was due to return to dry-dock at Chatham. However her sister ship HMS Cachalot had been rammed and needed serious attention in the dry-dock. Some repairs to Seal were carried out at Blyth, Northumberland, and she was required to take over Cachalot's minelaying duties. She was assigned to Operation DF 7, a mine-laying mission in the Kattegat between Denmark and Sweden. This was a particularly daunting task, especially for a submarine the size of Seal. Captain Bethall, the commanding officer of the flotilla, failed to persuade Admiral Horton to reconsider his orders.[4]
On 29 April, Seal left Immingham laden with fifty mines. On entering the Skagerrak, she met HMS Narwhal just leaving the area after having stirred up German defences by scoring six hits with six torpedoes. Seal was running at shallow depth to maintain speed and conserve energy, when she was spotted by a German Heinkel He 115 on 4 May at about 02:30 am. She dived to 90 feet (27 m) and was slightly damaged by a bomb. Later that morning, Lonsdale discovered German anti-submarine trawlers searching for them around her target area, and he had to divert to the secondary target area. At about 09:00 am, Seal started to lay down the 50 mines and completed that mission some 45 minutes later.[5]
Seal turned and headed for home, with the trawlers heading after her. Lonsdale took an evasive course, and used the Asdic to identify when the trawlers were stopping to listen. Then, at 3:00 pm, he spotted a patrol of nine German anti-submarine motor torpedo boats heading from a different direction. There were too many hours of daylight left, and the Kattegat was too shallow to allow a submarine as large as Seal to go deep and run for it. Lonsdale evaded detection by following a zig-zag course and at around 6:00 pm settled the submarine in stop-trim at the bottom of the sea. Unknown to the crew, they had entered an uncharted minefield. One of the submarine's hydroplanes caught a mine stay-cable and at about 06:30 pm, the attached mine was swept by the current onto the stern of the boat. There was a huge explosion and Seal was severely damaged.[6]
A painful increase in air pressure indicated that a large amount of water had entered the submarine. The crew's evening meal was catapulted round the mess rooms and the boat tilted bow upwards at about ten degrees. All the watertight doors were quickly sealed and all crew accounted for, after two who had been trapped in the after end of the boat managed to make their way to the control room. To the crew's surprise, the pursuing ships had not noticed the explosion and moved away. After various inspections and repairs, the crew had to wait until 10:30 pm when it was dark enough for an attempt to be made to raise the submarine.[7]
At 10:30 pm, the ballast tanks were "blown" and the main motors started, but the stern stayed firmly stuck on the sea bed. The bow rose at a sharp angle, and the attempt had to be abandoned. By this time, the air quality had deteriorated badly. Pumping carried on and emergency repairs were made to start the pump to blow air into the rear trimming system. For a second attempt to surface, the 11-ton drop keel was released. This meant that the submarine could not submerge again. More high pressure air was used to blow the remaining tanks, but again the attempt was unsuccessful. Carbon-dioxide poisoning was having an accelerating effect on the crew and a third attempt was called for, using the engines and main ballast. This also failed.[8]
At 1:10 am, Lonsdale, a devout Christian, called his crew to prayer and led them in the Lord's Prayer. The crew then responded to his order for them to move as far forward as they could to try to tip the balance, though many fainted or were sick. While thoughts went to using the Davies escape gear, it was realised that it would take several hours to escape by this method and there was a risk of flooding the entire craft before more than a few could escape. The engineers found they could open a salvage-blow[Clarification needed] and a final attempt was made to raise the submarine. The motors caught fire, but this went out for lack of oxygen. The batteries were nearly empty and the high pressure air exhausted. The engineer realised there was one air pressure group left with a tiny amount of air, which was some way up the companionway. He reached and opened the valve, and the submarine started to move upwards.[9]
Seal surfaced at 1:30 am. After the pressure was released, the fresh air caused blinding headaches to the crew, who had suffered oxygen deprivation. Lonsdale clambered to the bridge, and sighting land, decided to try to make for Swedish waters. The confidential papers were consigned to the sea bed, and the Asdics were destroyed and the pieces thrown overboard. Lonsdale sent a message to the Admiralty: "Am making for the Swedish coast". With the cipher books destroyed, Lonsdale did not receive two replies - "Understood and agreed with. Best of luck" and "Safety of personnel would be your first consideration after destruction of the Asdics". If he had, they would have saved him a considerable amount of anguish over his subsequent decisions. The rudder was damaged and the boat impossible to steer, but it was found that it could be made to go in reverse. Fair progress was made, but mud had entered the lubricating system and the one working engine seized up.[10]
At 02:30, Seal was spotted on the surface and attacked by two German Arado Ar 196s and another Heinkel. Lonsdale on the bridge, under fire, tried to fend them off with the Lewis guns, but these both jammed. With Seal under bombing and gunfire attack from the air,[11] unable to dive and without motive power, some men wounded and no remaining defences, he had no alternative but to surrender. The white messroom table-cloth was hoisted on the mast. Leutnant Schmidt brought his seaplane alongside and required the captain to swim to him. On his 35th birthday, Lonsdale swam to the seaplane, and shortly after, the chief petty officer swam to the other Arado. The crew waited on the submarine for the anti-submarine naval trawler UJ-128, to arrive at 06:30. It was expected that the boat, which was holed and listing, would sink of its own accord, but attempts were made to scuttle her. The German boarding party took the crew off, and the submarine was towed to Frederikshavn.[12]
The mine belt laid by the Seal sank one German freighter (Vogesen, 4241 BRT) and three Swedish ships between 5 May and 5 June for a total tonnage of nearly 7000 BRT.[13]
Under German control[]
Seal underwent temporary repairs at Frederikshavn to make her seaworthy, and was then towed to Kiel. Admiral Carls believed Seal was a war-winning asset and insisted that she be made operational, despite the probability that three superior new German U-boats could be built for the same cost. The equipment and armour were completely incompatible[14] and it would not be possible to obtain spares. Nevertheless, repair was undertaken and in the spring of 1941 she was commissioned into the Kriegsmarine as U B under the command of Fregattenkapitän Bruno Mahn. Mahn, at 52 years old, was the oldest German submarine commander on duty in World War II. She was used as a propaganda exhibit and training boat, but it took until late 1942 for Krupp to fabricate the whole mechanical system. Practice runs revealed so many snags and the financial costs were so unrealistic, that by the middle of 1943 she was paid off, stripped and abandoned in a corner of Kiel dockyard. Later she was hit and sunk in the same Allied air raid that sank the Hipper. The only value derived was the realisation that the British torpedo firing device was of superior design and its introduction into the German navy.[15]
Crew[]
The crew were subjected to routine interrogation in an atmosphere of mutual respect with their German captors. The officers and ratings were separated and held as prisoners of war in a succession of camps until April 1945. The submarine had been adopted by the village of Seal when it was commissioned, and during their imprisonment the crew received considerable support from the villagers.[16]
Two members of the crew managed to escape. Early on, the petty officers and ratings were held at Stalag XX A at Toruń in Poland. Petty Officer Barnes took part in a mass break out and with a soldier managed to make contact with the Polish underground. They made it to the Soviet border, but the Soviet border guards failed to understand them, robbed and stripped them and told them to run for it. Shots rang out and no more was heard of Barnes, although the soldier made it home.
One of the engineers, Don "Tubby" Lister, made a series of escapes and was eventually sent to Oflag IV-C at Colditz Castle. Realizing how hard it would be to escape from there, he and another ERA (Engine Room Artificer), W. E. "Wally" Hammond (from the sunken submarine HMS Shark, insisted on being moved on the grounds that they were not officers. The ruse worked, and they were moved to a more open camp. They escaped from there in late 1942 and made the several hundred mile journey to Switzerland and then home.[17][18] After three failed attempts, Lieutenant Trevor Beet was transferred to Colditz Castle for the rest of the war.[19]
The bulk of the officers and petty officers had been consolidated into Marlag (Marine-lager) naval camp near Westertimke, where, for most of the war, they led a fairly quiet existence. By April 1945, the Allies were at Bremen, 15 nautical miles (28 km) away, and they were marched off to Lübeck. During the journey, the column came under attack from Allied Spitfires. Shortly after they arrived there, the war came to an end and they returned to England. Apart from Barnes and Able Seaman Smith, who had disappeared overboard when the submarine surfaced, the entire crew survived.[20]
Lieutenant Commander Lonsdale was the only British captain to surrender his ship to the enemy in the entire war, and he and the officer he left on board, Lieutenant Trevor Beet, faced the inevitable court-martial in 1946; they were honourably acquitted.[21]
See also[]
- HMS Graph - The German U-Boat U-570, captured and taken into service by the Royal Navy.
- HMS X2 - the Italian, Archimede-class submarine, Galileo Galilei; captured and taken into service by the Royal Navy.
- HMS H6 - a World War I Royal Navy submarine interned by the Netherlands in 1916, and captured from them by the Germans in 1940.
References[]
- ↑ Warren and Benson (1961) pp23-24
- ↑ Warren and Benson (1961) pp25-31
- ↑ Warren and Benson (1961) pp34-45
- ↑ Warren and Benson (1961) pp46-48
- ↑ Warren and Benson (1961) pp49-62
- ↑ Warren and Benson (1961) pp63-70
- ↑ Warren and Benson (1961) pp70-91
- ↑ Warren and Benson (1961) pp91-104
- ↑ Warren and Benson (1961) pp105-115
- ↑ Warren and Benson (1961) pp116-127
- ↑ [1] Bekker. 1964 p. 91.
- ↑ Warren and Benson (1961) pp128-153
- ↑ HMS Seal (37 M)
- ↑ HMS Seal, Uboat.net
- ↑ Warren and Benson (1961) pp181-184
- ↑ - Account of HMS Seal and consequences of capture
- ↑ Reid, Patrick Robert (1953). The Latter Days at Colditz. London: Hodder and Stoughton
- ↑ Royal Naval Museum - Sea Your History: Photo of Hammond and Lister in Switzerland
- ↑ http://www.colditzcastle.net/british-pows/navy-photos/
- ↑ Warren and Benson (1961) pp184-287
- ↑ Warren and Benson (1961) pp218-228
Sources[]
- Warren, C. E. T, and Benson, James (1964). Will Not We Fear: The Story of His Majesty's Submarine "Seal" and of Lieutenant-Commander Rupert Lonsdale. London: Harrap.
- Colledge, J. J.; Warlow, Ben (2006) [1969]. Ships of the Royal Navy: The Complete Record of all Fighting Ships of the Royal Navy (Rev. ed.). London: Chatham Publishing. ISBN 978-1-86176-281-8. OCLC 67375475.
External links[]
- HMS Seal and UB from uboat.net
- "Lieutenant-Commander Canon Rupert Lonsdale" - article from submariners.co.uk
A short 1940 Kriegsmarine propaganda film, in German:
The story of HMS Seal and the captivity of her crew
| ||||||||
Coordinates: 54°22′N 10°11′E / 54.367°N 10.183°E
The original article can be found at HMS Seal (N37) and the edit history here.