| Battle of Santa Cruz de Tenerife | |||||||
|---|---|---|---|---|---|---|---|
| Part of the French Revolutionary Wars | |||||||
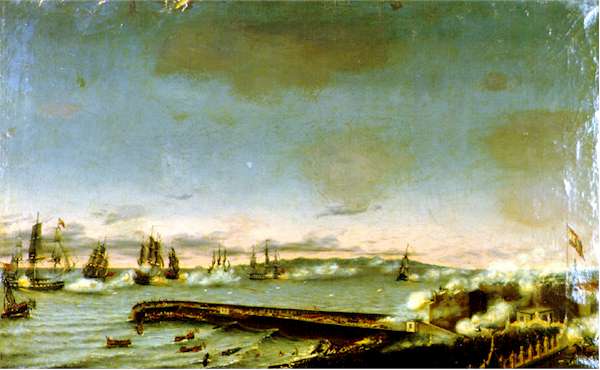 The British attack on Santa Cruz de Tenerife. Oil on canvas, 1848. | |||||||
| |||||||
| Belligerents | |||||||
|
|
| ||||||
| Commanders and leaders | |||||||
|
|
| ||||||
| Strength | |||||||
|
4,000 regulars and sailors, 3 ships of line, 1 fourth rate, 3 frigates, 1 cutter, 1 bomb-vessel, 400 guns |
1,700 regulars, militia, and sailors, 91 guns | ||||||
| Casualties and losses | |||||||
|
250 dead,[1] 128 wounded ~300 captured 1 cutter sunk |
30 dead, 40 wounded | ||||||
| |||||
The Battle of Santa Cruz de Tenerife was an amphibious assault by the British Royal Navy on the Spanish port city of Santa Cruz de Tenerife in the Canary Islands. Launched by Rear-Admiral Horatio Nelson on 22 July 1797, the assault was defeated, and on 25 July the remains of the landing party withdrew under a truce with the loss of several hundred casualties. Nelson himself had been wounded in the arm, which was subsequently partially amputated: a stigma that he carried to his grave as a constant reminder of his failure.[1]
Background: Cape St. Vincent and Cádiz[]
In February 1797 the British defeated a Spanish fleet near Cape St. Vincent but failed to strike a solid blow against the Spanish Navy in the uneven struggle. Admiral John Jervis sailed for Lisbon after the engagement, frustrated at the escape of several valuable prizes including the Santísima Trinidad. New orders from the Admiralty demanded that he subdue and blockade the Spanish port of Cádiz, where much of the battered Spanish squadron had sought shelter. The First Sea Lord thought that the ease of Jervis' victory over José de Córdoba y Ramos guaranteed a successful attack on that southern harbour. Events proved otherwise.
Jervis' ships besieged Cádiz but were repelled by unexpected Spanish resistance. The Spaniards, under Vice-Admiral Mazarredo, organized a flotilla of small gunboats converted from yachts. With a clear advantage in the harbour's shallow waters, these vessels manoeuvred in the darkness and savaged Jervis' heavy ships of the line, striking at their vulnerable areas with impunity.[2] Coastal batteries opened fire, joined by Spanish warships anchored at harbour, and drove the attackers back, causing the British to lose grip over the blockade and allowing several merchant convoys to slip in and out of the port.
An air of mutiny spread over the British crews as their long stay at sea stretched on without results. In April Jervis shifted his gaze to Tenerife upon hearing that Spanish treasure convoys from America arrived regularly at that island. The admiral sent two reconnoitring frigates which surprised and caught two French and Spanish vessels in a night-time raid. Encouraged by this success, Jervis dispatched a small squadron under recently promoted Rear Admiral Horatio Nelson with the aim of seizing Santa Cruz by means of an amphibious attack.
Execution[]
On 14 July Nelson sailed for the Canaries aboard his flagship HMS Theseus, (Captain Miller), leading a squadron composed of HMS Culloden (Captain Troubridge), HMS Zealous (Captain Hood), all 74-gun ships; and the frigates HMS Seahorse (38 guns), commanded by Captain Fremantle, HMS Emerald (36 guns) led by Captain Waller, and HMSTerpsichore (32 guns) under Captain Bowen; as well as a cutter, HMS Fox, under Lieutenant Gibson and a gunboat, HMS Ray, under Lieutenant Crompton. HMS Leander (50 guns), under Captain Thompson, joined the flotilla once the attack had started. The expedition counted 400 guns and nearly 4,000 men. They arrived in the vicinity of Santa Cruz on 17 July.
At Santa Cruz, Lieutenant General Antonio Gutiérrez de Otero y Santayana, a two-time victor over the British, had hastened to prepare a defence following the British raid in April. Forts were rebuilt, field works expanded, and the batteries enlarged by doubling their gun rows to 91, with earth sacks piled around. From the city's soldiers, partisans, local hunters, militia, artillery, and sailors from the captured French frigate, General Gutiérrez scraped together a force of 1,700 men.
British plans[]
Nelson's plan called for a night-time landing under Troubridge: The frigates would approach the shore in stealth and disembark troops with a view to falling on the Spanish batteries north east of the harbour. Ray was then to open mortar fire on the city. Nelson's ships of the line would enter the harbour at break of dawn and seize the Spanish merchant ships and their cargo. A note sent by Nelson to the Spanish authorities demanded the surrender of all Spanish cargo and threatened the destruction of the city.
On 20 July, Troubridge went aboard Theseus to sharpen the last details of his duties. His manoeuvre was conceived in two stages. The first called for a landing at Valle Seco beach, some two miles west of Santa Cruz harbour, from where the troops would surround and capture Fort Paso Alto. If the city had not surrendered at this point, a force of 1,000 infantry would march on the port and launch the definite attack. Each ship of the line provided 200 men and each frigate 100, supported by 80 artillerymen.
The battle[]
The plan began the next evening. In the clearness of the summer Canary night, citizens realised that blurry figures were sailing towards the pier: the British boats, carrying the troops, were on their way. They were in two groups: one of 23 boats and launches heading for the Bufadero cliff; the other, 16, coming right into the city. Authorities were updated as adverse currents held the English back. No marine bombardment was likely as ships could not get any closer and even though frigates could, the latter sported naval cannons of straight fire that could not be elevated to reach the city. The British had just one curve shot mortar which could inflict little damage. They had no howitzers and carronades were of no use in this situation. Spanish cannons began firing heavily on the boats, wrecking some of them. The currents were too strong and the British decided to go back to the ships.
In a second attempt, frigates were tugged by the boats close to the Bufadero, where they anchored. Despite the Paso Alto castle shooting, the contrary currents and the lack of animals to carry the artillery, 1,000 British soldiers landed on Valle Seco beach with some equipment. In the middle of the night, some of the boats did not reach the beach and ended up strewn around, as no British officers knew its location.
During 23 July a heavy cannonade and musketry duel took place. Gutiérrez managed to recruit more effectives and station them in the castle, as well as moving the forces from the Sta. Cruz fortress, now unnecessary, on to Paso Alto. The British, who lost two men, were under pressure and had a difficult time. Nelson, from the Theseus, called the troops back. Once they were on board, the three frigates slipped before the Candelaria beach and the Barranco Hondo, firing into the cliffs, intending to frighten and silence the defenders. Once thwarted in Valle Seco, Gutiérrez guessed Nelson's next move and brought most of the artillerymen to the port batteries, leaving just 30 militia men in Paso Alto. The British could not see the Spanish troops' movements from one place to another, so they deemed the Spanish force larger than it actually was.


Sir Horatio Nelson when wounded at Teneriffe by Richard Westall. Oil on canvas.


The Castillo de San Andrés played an important role in the battle.
Enraged by the failure of the first stage of his plan, Nelson called his captains on board Theseus and explained how he himself would lead the next move ahead of a boat group followed by five more boats led by captains Troubrige, Miller, Hood, Waller and Thompson straight to the San Cristóbal castle, in Sta. Cruz harbour, where Gutiérrez had by now assembled his best troops.
In order to reduce the noise, cloth-padded oars propelled the boats at 10:30 p.m. on 24 July from around the Zealous into the harbour. The Spanish frigate San José, anchored 500 metres away from the pier, fired an alarm shot when sailors on board heard the disembarking troops getting closer. Troubled waters were against the British, who amounted to 700 in the boats, supported by 180 in the cutter Fox and 80 in a Canary sloop taken earlier. Apart from the San Cristóbal castle, which had been engineered in order to emplace a huge 24-pound cannon, general Gutiérrez had split his force in four strategic points: Pila square, Santos stream, Carnicerías beach and Santo Domingo monastery.
At around 23:00 a rain of cannonballs and musket bullets from the batteries of Paso Alto, San Miguel, San Antonio and San Pedro fell on the approaching British whose own ammunition was damp with seawater. Several shots reached the cutter's hull. Some of the boats reached the beaches and marines managed to spike a couple of cannons, yet others drifted away. Spanish mortars and cannons focused on the successful sailors and swept them away. Many British casualties were left scattered on the beach. An immense line of fire, ranged from Paso Alto to San Telmo castle, targeted the small vessels. Before midnight the cutter Fox was hit by crossfire from the heights and sunk, and more than half her crew drowned.
British forces led by Bowen rushed the battery covering the harbour, captured it and spiked its guns. They began to pursue the fleeing Spanish into the town, but were swept by a hail of grapeshot. Bowen, his first lieutenant (George Thorp) and several of his men were killed, while Nelson, who was just landing from his boat, was hit in the right arm. Those soldiers who succeeded in reaching the beach were riddled with bullets from house terraces and windows. The citizens were so closely involved in repelling the attack to the point that, after the victory, some were given honours and medals.
Nelson was bleeding copiously and his stepson, Lieutenant Nisbet, cut a piece of his own neck handkerchief and tied it tightly around Nelson's arm to stop the bleeding. The admiral refused to use the frigate Seahorse that was stationed close by, to be taken back to his flagship, as it would imply that Captain Fremantle would have to hoist a flag of distress and thereby demoralise the crews. Instead, the sailors of his boat rowed hard back to the Theseus. The surgeon had been warned of the contingency and got his instruments ready. Nelson was cited as saying, as he pointed to his right arm “Doctor, I want to get rid of this useless piece of flesh here”. Nelson's operation was quick and aseptic. The limb was thrown over board, despite the admiral's wish to keep it.
The batteries increased the cannonade when they noticed that almost half of the thousand British soldiers had managed to land on the Carnicerías beach and were attempting to slip into the city. Captains Troubridge and Hood, leading 350 men, accomplished the taking of La Consolación convent. However, the rest of the troops were defeated when they tried to assault the San Cristóbal fortress from behind. Troubridge was aware of his desperate situation with no support from ships or more reinforcements coming to his aid, but sent a message to Gutierrez demanding the surrender of the San Jose or he would burn the town. Gutiérrez, a veteran soldier, refused. In the meantime, the Spanish general ordered the fire on the besieged British to be increased while he brought more artillerymen to the batteries closer to La Consolación.
The rest of the British forces achieved disembarkation in Las Carnicerías and proceeded through the Santos cliff. Despite the heavy fire from the Spanish fortresses, these men succeeded in joining Troubridge after being bottled up in Sto. Domingo square.
Gutiérrez had the Canarias battalion blockade the pier so that Troubridge could not make any escape back, nor could any support come in. Two columns headed for the harbour, one behind the Sto. Domingo square in order to hinder the British advance inside the city and the other along the coast. In the morning, a convalescent Nelson attempted to reinforce Troubridge by sending 15 boats into the pier. At around 1:00 am, Spanish gunfire swept the small squadron. Three of them were sunk with more than 30 drowned, the rest rowed back shocked.
Captain Troubridge sent another message to Gutiérrez through Captain Hood, requesting honourable terms for a withdrawal. Gutierrez agreed to this, and by 7.00 am a truce was signed that allowed the remaining British forces to return to their ships with full military honours.[3] For his part Hood undertook not to burn the town, or make any further attacks on Tenerife or the Canary Islands.[4]
Conclusion[]


Bust of Antonio Gutiérrez in Santa Cruz de Tenerife.
The Spanish suffered only 30 dead and 40 injured, while the British lost 250 dead and 128 wounded. The journey back to England was difficult, as Nelson had lost many men and sails.
Gutiérrez lent Nelson two schooners to help the shot-torn British on their way back. The Spanish general also allowed the British to leave with their arms and war honours. These acts of chivalry led to a courteous exchange of letters between Nelson and Gutiérrez. Nevertheless, Nelson would later remark that Tenerife had been the most horrible Hell he had ever endured—and not only for the loss of his arm. Nelson's letter offering a cheese as a gratitude token is actually on display at the new Spanish Army Museum in Toledo.
Nelson agreed to report news of the attack back to the Peninsula; the frigate Emeral approached Cádiz in late July carrying reports of Gutiérrez's victory. Jervis had expected the Union Jack to be flying over Santa Cruz and was furious when he learned about the fiasco: The Admiral apparently saw no difference between well-defended Spanish port cities such as Cádiz or Santa Cruz and the Spanish ships his squadron had beaten in February. Haughtiness and a lack of proper material and human resources for an invasion had drawn the British fleet to a painful defeat. The British never again tried to capture Santa Cruz.
See also[]
Notes[]
References[]
- Adkin, Mark (2007). The Trafalgar Companion: A Guide to History's Most Famous Sea Battle and the Life of Admiral Lord Nelson. London: Aurum Press. ISBN 1-84513-018-9.
- Oman, Carola (1996). Nelson. Naval Institute Press. ISBN 1-55750-618-3. http://books.google.com/?id=mzbxF5ZFfwgC.
- San Juan, Víctor (2005). Trafalgar: Tres armadas en combate. Silex Ediciones. ISBN 84-7737-121-0.
- Sugden, John (2004). Nelson: A Dream of Glory. London: Jonathan Cape. ISBN 0-224-06097-X.
- White, Colin (2002). The Nelson Encyclopedia. Stackpole Books. ISBN 0-8117-0013-5. http://books.google.com/?id=9etjK-7ZkUgC&printsec=frontcover.
Coordinates: 28°28′N 16°15′W / 28.467°N 16.25°W
The original article can be found at Battle of Santa Cruz de Tenerife (1797) and the edit history here.