
The Battle of Paardeberg or Perdeberg ("Horse Mountain") was a major battle during the Second Anglo-Boer War. It was fought near Paardeberg Drift on the banks of the Modder River in the Orange Free State near Kimberley.
Lord Methuen advanced up the railway line in November 1899 with the objective of relieving the besieged city of Kimberley (and the town of Mafeking, also under siege). Battles were fought on this front at Graspan, Colenso, Modder River before the advance was halted for two months after the British defeat at the Battle of Magersfontein. In February 1900, Field Marshal Lord Roberts assumed personal command of a significantly reinforced British offensive. The army of Boer General Piet Cronjé was retreating from its entrenched position at Magersfontein towards Bloemfontein after its lines of communication were cut by Major General John French, whose cavalry had recently outflanked the Boer position to relieve Kimberley. Cronje's slow-moving column was intercepted by French at Paardeberg, where the Boer general eventually surrendered after a prolonged siege, having fought off an attempted direct assault by Lieutenant General Horatio Kitchener.
Situation in February, 1900[]
An earlier British attempt to relieve Kimberley, led by Lieutenant General Lord Methuen, had been opposed by Boers under Cronjé and Koos de la Rey. Although the Boers had failed to prevent the British crossing the Modder River on 28 November, they had fought them to a standstill at the Battle of Magersfontein 13 days later, inflicting heavy casualties.
Over the next two months, the front south of Kimberley stagnated. A substantial Boer detachment under De la Rey was sent to Colesberg where, in contrast to the situation elsewhere, the Boers were being driven back by a roughly equal British force. Cronjé's remaining forces were weakened by lack of grazing for their horses. Many of the Boer fighters' families joined Cronjé's main encampment at Jacobsdal. The presence of large numbers of non-combatants with their slow-moving ox-drawn wagons would later prove a fatal handicap to Cronjé.
British plans[]
Field Marshal Roberts had been appointed to command the British forces in South Africa in December, 1899, succeeding General Buller. (Roberts had just learned that his son Freddy had been mortally wounded at the Battle of Colenso.)
Like Buller, Roberts at first intended to make a direct thrust on the Boer capitals of Bloemfontein and Pretoria, using the central railway line from Cape Town to these two capital cities as his line of communication. Also like Buller, he found on arrival in South Africa that public opinion both in Britain and South Africa was clamouring for the relief of British forces besieged at Ladysmith, Kimberley and Mafeking and was forced to modify his plans.
Leaving Buller in command of the attempt to relieve Ladysmith, Roberts collected large numbers of reinforcements which had recently arrived in South Africa along the railway line between the Orange and Modder rivers. He intended to outflank the Boer left and pass his cavalry around them to relieve Kimberley, while his infantry secured vital fords behind them. Roberts had two infantry divisions (the 6th and the 7th) each of two infantry brigades, and a mounted division of three brigades under Major General John French. Another infantry division (the 9th, under Lieutenant General Henry Edward Colville) was formed during the campaign.
Relief of Kimberley[]


Major-General Sir John French
While Methuen's 1st Division demonstrated against the Boer entrenchments at Magersfontein and the Highland Brigade under Major General Hector MacDonald marched 20 miles (32 km) westward to Koedoesberg and fixed the Boers' attention to their right flank, Roberts's large force began marching east in secret, late on 11 February. By the evening of 12 February, his leading horsemen had secured fords across the first obstacle, the Riet River. The next day, 13 February, the British mounted force made a gruelling march of 30 miles (48 km) under a blazing sun to capture fords across the Modder. The effect of the heat was made worse when the dry grass of the veld caught fire from a carelessly discarded match. French's division had to wait at the fords (at Klip Drift) during the next day until the leading infantry reached them, after making an equally exhausting march. Luckily for the British, the move had taken the Boers by surprise and they did not move in strength to defend the fords or the hills nearby.
Early on 15 February, French's division began the final march to relieve Kimberley. Only scattered and disorganised Boers opposed them, and the enormous mass of British horsemen broke through their thin line, concealed in the dust cloud they created. Late that evening they reached Kimberley, where they were greeted with cheering crowds. French should by rights have gone to the military commander of the besieged garrison, Lieutenant Colonel Kekewich. Instead he called first on Cecil Rhodes, the former Prime Minister of Cape Colony and foremost Imperialist, at the town's chief hotel.
The final day's ride had crippled most of French's division. Most of his British regular cavalry carried too much equipment and their unacclimatised horses (and those of the seven batteries of horse artillery) were exhausted. His effective force was reduced to two regiments of New Zealand and Australian light horse, and two "brigades" (actually battalions) of mounted infantry. French was to further tire his men on 16 February by futile attempts to intercept one of the Boers' Creusot 40-pounder siege guns (nicknamed "Long Tom") which was withdrawing to the north.
Cronjé's move to Paardeberg[]


Stereoscopic photograph of an ammunition wagon exploding during the Battle of Paardeberg
Also on 15 February, Cronjé's men, some 5,000 Transvaalers and Freestaters, finally evacuated their laager at Jacobsdal. Their position at Magersfontein was no longer relevant and they were in danger of being besieged in Jacobsdal by the British 7th Division under Lieutenant General Tucker, which had turned west from Klip Drift. On the night of the 15th, the large convoy of Boer ox-wagons passed between the rear of French's division and the outposts of Lieutenant General Thomas Kelly-Kenny's 6th Division at the Modder fords. Throughout the next day, the Boer mounted rearguards prevented the British 6th Division (with only one understrength mounted infantry unit) overtaking them. On the 17th, the large convoy of Boer wagons reached the crossing of the Modder at Paardeberg Drift. They were starting to cross the river when a force of 1,500 British mounted troops, almost all of French's fit horses and men who had covered the 40 miles (64 km) from Kimberley in another desperately tiring march, opened fire on them unexpectedly from the north, causing confusion.
Cronjé then inadvisedly decided to form a laager and dig in on the banks of the Modder river. His reasons for doing so are unclear. The British now outnumbered his force significantly and enjoyed overwhelming superiority in artillery. All the British would have to do was lay siege to the Boer position and bombard them at their leisure. On the other hand, the British had insufficient cavalry and it would have been an easy matter for Cronjé to brush them aside and link up other Boers east of the Modder; those under noted commander Christiaan De Wet who were only 30 miles (48 km) away to the south-east and other forces under Chief Commandant Ignatius S. Ferreira a similar distance to the north.
Bloody Sunday[]


Battle of Paardeberg, South African War Memorial (Halifax), Province House (Nova Scotia), Canada by Hamilton MacCarthy
Lieutenant General Kelly-Kenny, commanding the British 6th Division, had a sound plan to lay siege to Cronjé and bombard his force into surrender. This would almost certainly have proved successful and cost the British very few casualties. However, Roberts was ill, and his Chief of Staff, Lieutenant General Herbert Kitchener, was now in overall command of the British force. He had different plans, and overruled Kelly-Kenny.
Kitchener proceeded to order his infantry and mounted troops into a series of uncoordinated frontal assaults against the Boer laager. This was despite the fact that the cost of frontal assaults against entrenched Boers had been demonstrated time and again the preceding months. It was no different this time. The British were shot down in droves. It is thought that not a single British soldier got within 200 yards (180 m) of the Boer lines. By nightfall some 24 officers and 279 men were killed and 59 officers and 847 men wounded. Judged by British casualties it was the most severe reverse of the war and became known as Bloody Sunday.
Kelly-Kenny had warned Kitchener not to leave "Kitchener's Kopje" undefended. Possession of the kopje was essential to guard the south-east of the British position and prevent Cronjé's escape. But Kitchener, in his zeal for an all-out attack, had left the kopje defended by only a handful of "Kitchener's Horse" (volunteer British colonists). De Wet was therefore able to take the kopje with little resistance. The strategic picture had now changed dramatically. De Wet could now make the British position on the south east bank of the Modder untenable, and the Boers now commanded a swathe of front stretching from the north east right through to the south east. As darkness fell, Kitchener ordered his troops to dig in where they were. Few received these orders and fewer still obeyed them. Desperately thirsty and exhausted, the surviving British trickled back into camp. Rescue for Cronjé now seemed the likely outcome.
But seen from the Boer side, things were also bad. Cronjé and his men had been in headlong retreat for several days with the British snapping at their heels. While casualties from the bombardment had been reduced to around 100 dead and 250 wounded by the soft bank of the Modder, the horses, oxen and wagons had no trenches in which to shelter. Many wagons were destroyed. Ammunition exploded and stores were ruined. For many of the Burghers, these wagons carried all their worldly possessions. The loss of their horses was even worse, for the horse was almost as important to the fighting ability of a Boer as his Mauser rifle. The morale in Cronjé's laager was desperate.
Siege[]
As the sun came up on the morning of Monday, 19 February, General Roberts arrived on the scene. He initially urged a resumption of the frontal assaults, but Cronjé requested a cease-fire to bury the dead. The British refused and Cronjé replied "If you are so uncharitable as to refuse me a truce as requested, then you may do as you please. I shall not surrender alive. Bombard as you will.""Error: no |title= specified when using {{Cite web}}". May 2012. The truce communications had taken up much of the day and there was no time for any more assaults.
The following day Roberts and Kitchener again planned to launch more assaults, but were firmly resisted by the other British senior officers. By 21 February, Roberts was intent on withdrawing, but to do so would have allowed Cronjé to escape. The Boers withdrew first. De Wet, faced with an entire British division who might be reinforced at any time, and fearing for his men's safety, withdrew his commandos from the south east. Ferreira's forces, which might have supported De Wet, had been left without direction after Ferreira was accidentally shot dead by one of his own sentries. Cronjé had inexplicably refused to abandon his laager. Now De Wet had to abandon Cronjé.
Boer surrender[]

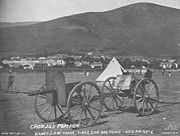
Boer pom-pom captured after the battle
Cronjé's encampment was subjected to an increasingly heavy artillery bombardment, as more guns (including a battery of 5-inch medium howitzers and another of 1-pounder "pom-poms") joined the besieging British forces. Almost every horse, mule and ox was killed, and the stench and flies became unbearable. On the final day of the battle, the Royal Canadian Regiment of Infantry, having lost more than 70 soldiers in an earlier charge against sheltered Boer positions, were again called to take the lead in the routine daily battalion rotation. Instead of another charge the next morning as was expected, the Canadians, with the help of Royal Engineers, advanced at night towards the Boer camp, then set about digging trenches on high ground 65 yards from the Boer lines. On 27 February 1900, the Boers woke up staring into the muzzles of Canadian rifles and surrendered. Cronjé surrendered with some 4,019 men and 50 women; around 10% of the Boers' entire army were now prisoners.
The Boer War marked the first ever overseas deployment of the Canadian Army. The Toronto company of the Royal Canadian Regiment had joined the Queensland Mounted Infantry in dispersing a Boer commando at Sunnyside and Belmont in the Western Cape in January.
The account of this battle and of Cronje's surrender is given in much greater depth by AB Paterson, war correspondent for the Sydney Morning Herald, "embedded" with the New South Wales Lancers. Paterson states that Cronje had decided on the previous night to surrender at 6am on 27 February as his supplies were exhausted, but when the Canadians attacked at 4am he refused to be hurried and fought for two hours at a cost to the Canadians of "15 or 20 shot and many more wounded", then surrendered at 6am as planned, and with some considerable degree of dignity. This account differs slightly in detail to that above and deserves to be noted.[3]
See also[]
- Bombardment in the Second Boer War
- Military history of South Africa
- Battle of Poplar Grove
- Douglas Monypenny
References[]
- Conan Doyle, Sir Arthur. “19”, The Great Boer War at Project Gutenberg
- Kruger, Rayne (1964). Goodbye Dolly Grey: Story of the Boer War. New English Library. ISBN 0-7126-6285-5.
- Pakenham, Thomas (1979). The Boer War. Cardinal. ISBN 0-7474-0976-5.
- Michael Rayner (2006). Battlefields. Struik. pp. 92–95. ISBN 1-77007-417-1. http://books.google.com/?id=NwLaIedYyPMC&pg=PA92.
- Hillegas, Howard C. (1900). With the Boer Forces. London: Methuen & Co.. http://www.archive.org/details/withtheboerforce16462gut.
Footnotes[]
- ↑ http://militaryhistory.about.com/od/battleswars1900s/p/paardeberg.htm
- ↑ http://militaryhistory.about.com/od/battleswars1900s/p/paardeberg.htm
- ↑ "From the Front, AB Paterson's Dispatches from the Boer War", edited by RWF Droogleever, Pan MacMillan Australia, 2000.
External links[]
The original article can be found at Battle of Paardeberg and the edit history here.