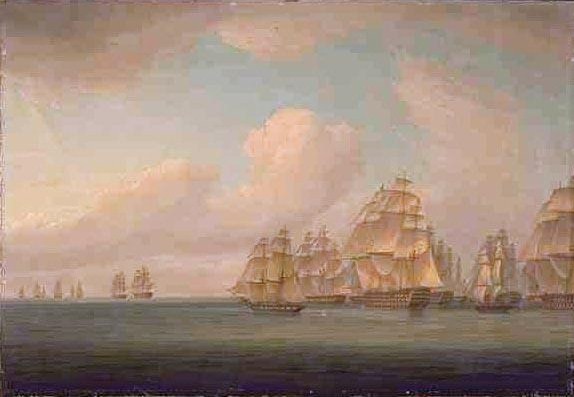
Allemand's squadron in pursuit of the Calcutta convoy, 25 September 1805, Thomas Whitcombe, National Library of Australia
Allemand's expedition of 1805, often referred to as the Escadre invisible (invisible squadron) in French sources, was an important French naval expedition during the Napoleonic Wars, which formed a major diversion to the ongoing Trafalgar Campaign in the Atlantic Ocean. With the French Mediterranean Fleet at sea, Emperor Napoleon I hoped to unite it with the French Atlantic Fleet and together form a force powerful enough to temporarily displace the British Royal Navy Channel Fleet for long enough to allow an invasion force to cross the English Channel and land in Britain. In support of this plan, the French squadron based at Rochefort put to sea in July 1805, initially with the intention that they would join the Atlantic Fleet from Brest. When this fleet failed to put to sea, the Rochefort squadron, under Contre-Admiral Zacharie Allemand, went on an extended raiding cruise across the Atlantic, both to intercept British trade left lightly defended by the concentration of British forces in European waters and with the intention of eventually combining with the French Mediterranean Fleet then blockaded in Spanish harbours.
On 25 September, Allemand achieved a major success when his squadron, while waiting for a convoy from the Leeward Islands, encountered a seven ship convoy from the island of Saint Helena. The convoy's commander, Captain Daniel Woodriff in the fourth rate HMS Calcutta, sought to interpose his ship between the French squadron and his convoy and was captured after a fierce battle. All except one of convoy escaped, and by deliberately drawing the French away from his own convoy's direction, he had saved the Leewards Islands convoy from attack as well. After the battle, Allemand was forced to conduct repairs at Tenerife, sailing again on 17 October, four days before the French Mediterranean Fleet was destroyed at the Battle of Trafalgar. With the planned invasion impossible, Allemand began commerce raiding in the Eastern Atlantic, capturing 43 merchant ships during his cruise and successfully disrupting the British blockade of Cadiz. This had an unintended but significant effect on the Atlantic campaign of 1806, resulting eventually in the Battle of San Domingo in February 1806. Allemand returned to Rochefort on 23 December, having not lost a single ship during the expedition.
Trafalgar campaign[]
In March 1805, the French Mediterranean Fleet sailed from Toulon under Vice-Admiral Pierre-Charles Villeneuve for an extended cruise to the West Indies, ultimately under orders to link with the French Atlantic Fleet based at Brest. Together these fleets would stage a major operation in the English Channel, driving off the Royal Navy Channel Fleet and allowing a fleet of landing barges to land on the southern coast of England as the first move in an invasion of Britain.[1] Arriving at Martinique on 14 May, Villeneuve waited for reinforcements from the Atlantic fleet, only to be informed on 2 June that they had failed to leave port. Despite repeated orders issued to the Atlantic fleet instructing them to sail to Martinique, Vice-Admiral Honoré Ganteaume had failed in his one effort to break out of Brest during March and then given up. His entire fleet ultimately remained in port throughout the campaign.[2] On 7 June Villeneuve learned of the arrival in the Caribbean of the British Mediterranean Fleet under Vice-Admiral Lord Nelson and hastily sailed back to Europe, eventually sheltering in the Spanish harbour of Vigo after an encounter on 22 July with a British fleet under Sir Robert Calder at the Battle of Cape Finisterre, in which two of his ships were captured. In the aftermath of the spring campaign, both Nelson and Calder returned to Britain, leaving only relatively small squadrons off the French and Spanish coasts.[3]
Despite delays to his plan, Napoleon had pressed ahead with preparations for the Channel campaign: an army of 200,000 men was assembling at Boulogne for the invasion, and orders continued to insist that the fleets under Villeneuve and Ganteaume put to sea.[4] Also ordered to sail was the squadron based at the Atlantic port of Rochefort, led by Contre-Admiral Zacharie Allemand. Allemand's squadron consisted of the powerful 120-gun ship Majestueux, three other ships of the line and several frigates and brigs, forming a significant force in its own right and a valuable addition to any battle fleet. Allemand was ordered to cruise off the southern coast of Cornwall, awaiting the combined fleets of Villeneuve and Ganteaume and their descent into the Channel. If this force did not materialise, Allemand was subsequently ordered to the Bay of Biscay to join up with Villeneuve on his route northwards and should this too fail then he was to conduct an extended commerce raiding operation in the Atlantic to take advantage of the concentration of British forces off Europe and the consequent exposure of British trade.[5]
Bay of Biscay[]
Allemand sailed from Rochefort on 16 July while the blockade squadron under Rear-Admiral Charles Stirling was out of position, rapidly escaping the coast into the Atlantic. On 17 July, the squadron outran and captured the British brig HMS Ranger, rated as 18 guns but actually carrying 24. Ranger's crew had observed the approaching French squadron from some distance, and Commander Charles Coote had ordered that once their capture was inevitable, the crew were to cause as much damage as possible to their vessel to deny its use to the French. So successful were these efforts that Allemand was forced to burn Ranger once her crew had been removed as prisoners of war.[5] Allemand subsequently reached his first station, off The Lizard, the day after capturing Ranger. There he waited in vain for the fleet under Ganteaume, which had never departed Brest. Following his instructions, Allemand then sailed for the Bay of Biscay, where he was to meet the fleet under Villeneuve that had been ordered north to join with Ganteaume. He passed southwards during July and was in the region of Cape Finisterre on 22 July: later records show that he was close enough to the site of the Battle of Cape Finisterre to have participated in the engagement if he had been aware that it was underway.[6] News of Allemand's presence reached Villeneuve early in August and on 5 August he despatched the frigate Didon (1805) in search of the Rochefort squadron. Didon was followed on 9 August by the main fleet, including 29 ships of the line and associated frigates and corvettes. Villeneuve passed up the Spanish coast, anchoring off the village of Zerez, near Ferrol, on 10 August and departing the following day in a west by northwest direction.[7] On 13 August the fleet was spotted by the frigates HMS Iris under Captain Edward Brace and HMS Naiad under Captain Thomas Dundas, who were forced to flee a French detachment sent in pursuit, losing sight of the enemy on 14 August as Villeneuve's main force continued to the northwest.[7] While Villeneuve was searching for Allemand, the Rochefort squadron was passing south along the Spanish coast in search of Villeneuve, anchoring at Vigo on 16 August without having seen any sign of the combined fleet. Villeneuve had not left instructions at Vigo for the Rochefort squadron and Allemand was uncertain where his superior was intending to sail to.[8] One of Villeneuve's scouting frigates meanwhile had spoken with a Danish ship that reported a fleet of 25 British ships of the line actively searching the region for the combined fleet. When on the evening of 14 August Villeneuve's scouts sighted the ship of the line HMS Dragon under Captain Edward Griffiths, the frigate HMS Phoenix and the captured Didon to the west, the French admiral assumed they were an advance guard of this British fleet and turned away to the south, the impression encouraged by frantic signals raised by Dragon.[9] In fact, these ships were the only British forces in the region. The Danish ship had been boarded by Dragon earlier in the day and her crew deliberately fed misinformation about British strength. When the French scouts sighted Dragon, the presence of the captured Didon and Captain Griffiths' signals, that were made to an expanse of empty sea beyond the visible horizon on the French ship, successfully misled the French admiral into fleeing a non-existent fleet.[10]
Bypassing Vigo on his flight southwards, Villeneuve put into the Southern Spanish fleet base of Cadiz on 20 August. By abandoning his efforts to reach the English Channel, Villeneuve was in effect abandoning the entire invasion strategy and, when news of Villeneuve's retreat reached him, Napoleon decided to formally abandon the campaign, marching the army at Boulogne south to the Austrian border.[11] Without instructions from his superior, and with no idea where the main French fleet was, Allemand spent much of August off the Spanish coast before deciding to turn to the third aspect of his orders, the disruption of British trade.[12]
The Calcutta convoy[]
| Action of 26 September 1805 | |||||||
|---|---|---|---|---|---|---|---|
| Part of the Napoleonic Wars | |||||||
 Magnanime engaging HMS Calcutta, Thomas Whitcombe, National Library of Australia | |||||||
| |||||||
| Belligerents | |||||||
|
|
| ||||||
| Commanders and leaders | |||||||
| Contre-Admiral Zacharie Allemand | Captain Daniel Woodriff | ||||||
| Strength | |||||||
| 5 ships of the line, 2 frigates and 2 corvettes. Only Armide and Magnanime engaged. | fourth rate HMS Calcutta | ||||||
| Casualties and losses | |||||||
| negligible | 6 killed, 6 wounded, Calcutta and merchant ship Brothers captured | ||||||
The threat posed by the fleets in Brest and Cadiz was stretching the Royal Navy, and convoy escorts were weaker than usual as so many vessels had been diverted to the blockade fleets needed to watch French and Spanish movements. As a result, there were a number of independently sailing merchant ships in the Bay of Biscay and Allemand encountered and captured three on his journey north into the area later known as the Western Approaches. From the prisoners taken out of these ships, the French admiral learned that a large convoy was due from the West Indies, protected only by a single ship of the line, HMS Illustrious. This rich prize would be a major success for Allemand and his squadron cruised the Western Approaches in anticipation of its arrival during September 1805.[5]
At 12:00 on 25 September at 49°30′N 09°00′W / 49.5°N 9°W, Armide, an outlying frigate from Allemand's squadron, spotted sails to the southeast. Closing to investigate, these sails were identified as a small British convoy, not the expected force under Illustrious but another convoy from Saint Helena, consisting of the East Indiaman Indus, two whalers, three small merchant ships, the slow merchant vessel Brothers and the 50-gun fourth rate ship HMS Calcutta.[13] The convoy had departed Saint Helena with seven ships on 3 August, and made fast time northwards until 14 September when it was joined by Brothers, which had been blown out of the Illustrious convoy by Atlantic gales several days earlier. Brothers was a heavily laden ship that sailed poorly, and as a result the entire Saint Helens convoy was severely delayed. When lookouts on Calcutta sighted the sails to the northwest, Captain Daniel Woodriff was not immediately alarmed. He was expecting the Illustrious convoy from that direction, and knew that a number of British squadrons were at sea. Throughout the afternoon and the following night the sails closed with his squadron until at 11:00 on 26 September they were close enough for Woodriff to make the Royal Navy secret recognition signals.[13]
By 12:00, Woodriff had realised that the approaching ships did not know the recognition signals and therefore must be enemies. With his first priority to protect his convoy, Woodriff sent an urgent message to Indus, the largest and strongest of the merchant ships, to lead the main body of the convoy ahead eastwards at all speed.[14] With his most valuable charges now making distance away from the French, Woodriff persuaded the captain of Brothers to sail northwards while he intended to engage the French directly and draw them southwards, away from the Saint Helena convoy and also away from the projected track of the Illustrious convoy. Once the merchant ships were gone beyond the horizon, Woodriff turned Calcutta about and sailed directly for the nearest French ship, the frigate Armide, which was gaining on his vessel.[15] Armide was far more nimble than the lumbering Calcutta, and rapidly passed her out of range of her broadside, the frigate turning about and opening fire with her stern chasers, cannon mounted in the front of the ship, at 15:00. Calcutta replied ineffectually with her bow chasers, until Armide allowed the British ship to draw alongside. The two ships then opened a heavy fire on one another which continued for an hour until Armide, with her rigging badly damaged, drew back towards the rapidly approaching French squadron.[14]
At 17:00, the leading French ship of the line, Magnanime, came within range with her bow chasers. Calcutta continued sailing southwards, remaining ahead of the squadron but not at a sufficient distance to avoid Magnanime's fire. Realising that unless he took drastic measures his ship would be caught, Woodriff turned Calcutta back towards Magnanime, hoping to disable her before the next ship in line, the frigate Thétis, could join the battle.[15] Captain Pierre-François Violette on Magnanime prepared to meet Calcutta and the engagement rapidly became furious, Calcutta and Magnanime exchanging full broadsides at close range. Within 45 minutes, it was clear that Woodriff's gamble had failed. The larger and more powerful Magnanime inflicted severe damage to the British ship's rigging, rendering her unable to manoeuvre or escape, with the remainder of the French squadron bearing down. With defeat inevitable, Woodriff spared the lives of his men by striking his colours and surrendering to Violette.[14] Although Calcutta was badly damaged among her rigging and sails, her hull had suffered little from the engagement and she had only lost six killed and six wounded. French casualties were negligible, although Armide was forced to undergo extensive temporary repairs on her own sails and rigging before she was able to operate as a scout once more. Brothers had also been captured: the corvette Sylphe had separated during the chase and rapidly overhauled the lumbering merchant ship, which had surrendered without a fight.[14]
Raiding operations[]
Woodriff's resistance had an important indirect effect on Allemand's cruise. In drawing the squadron southwards, Woodriff had pulled them out of the line travelled by the Illustrious convoy. In the aftermath of the engagement, it took two days to repair the battered Calcutta and in that time the convoy had safely passed Allemand's former position without sighting the French force.[14] With his object frustrated, Allemand completed the repairs to Calcutta and crewed her with men drawn from the rest of the squadron, adding the ship to his force. Aware that news of his presence would rapidly spread, Allemand subsequently turned southwards, sailing from the North Atlantic to the coast of North Africa to avoid pursuing British forces. There Allemand anchored for a time at the Spanish island of Tenerife, where he was able to repair and resupply his squadron before embarking on a lengthy cruise against the British convoys that regularly crossed the region.[16]
Elsewhere, the Trafalgar campaign reached its climax on 21 October 1805, when Villeneuve's fleet was intercepted at sea off Cadiz by Nelson's fleet and destroyed at the Battle of Trafalgar, the French and Spanish losing 17 out of 30 ships of the line.[17] The British fleet did not lose a single ship, but the cost of the victory was severe: Lord Nelson, victor of four major battles in the previous eight years, had been killed at the height of the combat by a musket ball. The survivors of the combined fleet scattered, most making their way back to Cadiz. However, the four ships of the French vanguard, which had rapidly outdistanced the battle and not returned, escaped towards the Bay of Biscay under Contre-Admiral Pierre Dumanoir le Pelley.[17] Allemand's cruise was to have unforeseen consequences for Dumanoir's squadron: among the British forces mustered to hunt for the ships from Rochefort was a squadron under Rear-Admiral Sir Richard Strachan in HMS Caesar, consisting of five ships of the line and two frigates. On 2 November, the frigate HMS Phoenix, which had also been ordered to search for signs of Allemand, discovered four French ships near Cape Finisterre. Unaware of the events of Trafalgar and assuming these ships to be a part of Allemand's force, Captain Dundas sought to lure them towards Strachan's squadron, which he knew to be in the area.[18] Dundas was successful in provoking Dumanoir to chase his frigate, and two days later, on 4 February, Strachan was able to bring the French squadron to battle, capturing all four ships at the Battle of Cape Ortegal.[19]
As these events unfolded Allemand was many hundreds of miles to the south, preying successfully on the trade that passed along the African coast without any serious opposition from major British forces, which were still largely confined to European waters. There was particular fear in Britain that Allemand might intercept two convoys of vital strategic importance: one extremely valuable convoy from India to Britain that also carried Major-General Sir Arthur Wellesley as a passenger, and an expeditionary force under Admiral Sir Home Riggs Popham for a planned invasion of South Africa. In the event however, both these convoys managed to successfully avoid Allemand's force.[20] On 20 November, with his supplies running low, Allemand attacked a convoy of seven ships sailing from Britain to Gorée, passing close to the Savage Islands.[21] Although his attack was successful, Allemand was unable to prevent the escape of the convoy's escort, the 18 gun brig HMS Lark under Commander Frederick Langford. Making all sail northwards in search of reinforcements, Langford encountered his target on 26 November, meeting HMS Agamemnon, one of the ships that made up the squadron under Vice-Admiral Sir John Thomas Duckworth. Duckworth had, with his subordinate Rear-Admiral Thomas Louis, been ordered to keep a close blockade on Cadiz in case the remainder of the combined fleet that still sat at anchor there should try to escape. The work was tedious, and Duckworth immediately abandoned his post when news of attack by Allemand's squadron reached him. He cast southwards in search of the French, leaving Cadiz guarded by just two frigates.[22]
Allemand was aware of the risk involved in allowing Lark to escape, and was already many miles to the north when Duckworth headed southwards. There was no benefit to be had in a battle with Duckworth or any other British squadron and he did not delay on his journey home, reaching Rochefort without further incident on 23 December.[16] His actions off the Savage Islands were to have far reaching consequences however. Duckworth continued southwards for much of December 1805, only turning back north once he had reached the Cape Verde Islands, a point far too far south for Allemand to have been operating in. Accepting that his enemy had escaped him, Duckworth turned back north but soon afterwards ran into the frigate HMS Arethusa under Captain Charles Brisbane, whose large convoy had been broken up by an unidentified French battle squadron in the Bay of Biscay.[23] Assuming this force to be Allemand, Duckworth set a course to intercept them based on their last known heading. Duckworth's reckoning was good, and on 26 December he encountered a large squadron and immediately gave chase. It was not until sometime later that he realised the force he was chasing was too large to be Allemand's: in fact Duckworth had stumbled into a squadron under Contre-Admiral Jean-Baptiste Willaumez, sent from Brest with another force under Contre-Admiral Corentin Urbain Leissègues on 15 December at the start of the Atlantic campaign of 1806, an operation largely inspired by the success of Allemand's expedition.[24] Although Willaumez was eventually able to outrun Duckworth, the chase continued for so long that Duckworth's squadron was forced to take on fresh supplies at St Kitts in the West Indies. There news reached him that Leissègues had been sighted off Santo Domingo and he sailed to investigate, annihilating the French squadron at the Battle of San Domingo in February 1806.[25]
Aftermath[]
The French naval authorities considered Allemand's cruise a major success in a year that had cost them huge numbers of ships and men. In addition to Ranger and Calcutta, Allemand had captured the hired naval cutter Dove and 43 merchant ships, including the lumbering Brothers. With the exception of Calcutta, all of these prizes had been burnt and their prisoners had been transferred to the French squadron, 1,200 in total. For minimal casualties, Allemand had inflicted a blow against British Atlantic trade and tied up substantial Royal Navy resources during a complicated and strategically vital campaign.[26] Calcutta was bought into the French Navy and became an armed storeship, still carrying the designated 50-guns. She served for three years before her destruction at the Battle of the Basque Roads in April 1809. Her British officers were later exchanged and honourably acquitted at the court-martial that investigated her loss.[16]
In France, Allemand was highly commended for the success of his operation, especially as both Leissègues and Willaumez met with disaster during the 1806 campaign. He remained with the Atlantic fleet for the next two years and in 1808 commanded a second successful operation in the Atlantic, carrying reinforcements to the Mediterranean Fleet at Toulon. In 1809 he returned to the Brest fleet as its commander, his ships trapped near the Île-d'Aix. He subsequently commanded the fleet at the defeat of the Battle of Basque Roads.[27] His captains on the expedition were also praised and two later led their own campaigns, although both ended in defeat: Captain Éléonore-Jean-Nicolas Soleil was in command of the frigate squadron destined for the West Indies that was destroyed in the Bay of Biscay at the Action of 25 September 1806,[28] while Captain Amable-Gilles Troude led a larger squadron to the West Indies in early 1809, suffering defeat in a battle off the Îles des Saintes.[29]
Order of battle[]
| Admiral Allemand's squadron | ||||||||||
|---|---|---|---|---|---|---|---|---|---|---|
| Ship | Guns | Commander | Notes | |||||||
| Majestueux | 120 | Contre-Admiral Zacharie Allemand Captain Etienne-Joseph Willaumez |
||||||||
| Magnanime | 74 | Captain Pierre-François Violette | Heavily engaged with Calcutta, suffered moderate damage. | |||||||
| Jemmapes | 74 | Captain Jean-Nicolas Petit | ||||||||
| Suffren | 74 | Captain Amable-Gilles Troude | ||||||||
| Lion | 74 | Captain Éléonore-Jean-Nicolas Soleil | ||||||||
| Calcutta (1795) | 50 | Captured on 26 September and remained with the squadron throughout the cruise. | ||||||||
| Armide | 40 | Louvel | Heavily engaged with Calcutta, suffered moderate damage. | |||||||
| Gloire | 40 | Commander Bonamy | ||||||||
| Thétis | 36 | Lieutenant Baudoin | ||||||||
| Sylphe | 16 | Langlois | ||||||||
| Palinure | 16 | Jance | ||||||||
| Source: James, p. 148 | ||||||||||
Notes[]
- ↑ Mostert, p. 439
- ↑ The Campaign of Trafalgar, Gardiner, p. 99
- ↑ The Campaign of Trafalgar, Gardiner, p. 130
- ↑ Mostert, p. 469
- ↑ 5.0 5.1 5.2 James, Vol. 4, p. 148
- ↑ Clowes, p. 118
- ↑ 7.0 7.1 James, Vol. 4, p. 17
- ↑ Clowes, p. 124
- ↑ Clowes, p. 121
- ↑ James, Vol. 4, p. 18
- ↑ Mostert, p. 471
- ↑ Clowes, p. 169
- ↑ 13.0 13.1 James, Vol. 4, p. 147
- ↑ 14.0 14.1 14.2 14.3 14.4 James, Vol. 4, p. 149
- ↑ 15.0 15.1 Clowes, p. 371
- ↑ 16.0 16.1 16.2 James, Vol. 4, p. 150
- ↑ 17.0 17.1 The Campaign of Trafalgar, Gardiner, p. 133
- ↑ Woodman, p. 203
- ↑ Clowes, p. 174
- ↑ Rodger, p. 542
- ↑ Clowes, p. 186
- ↑ James, Vol. 4, p. 187
- ↑ Woodman, p. 216
- ↑ Rodger, p. 545
- ↑ James, Vol. 4, p. 199
- ↑ Rodger, p. 543
- ↑ Adkins, p. 271
- ↑ The Victory of Seapower, Gardiner, p. 27
- ↑ James, Vol. 5, p. 164
References[]
- Adkins, Roy & Lesley (2006). The War for All the Oceans. Abacus. ISBN 0-349-11916-3.
- Clowes, William Laird (1997 [1900]). The Royal Navy, A History from the Earliest Times to 1900, Volume V. Chatham Publishing. ISBN 1-86176-014-0.
- Gardiner, Robert, ed (2001 [1998]). The Campaign of Trafalgar. Caxton Editions. ISBN 1-84067-358-3.
- Gardiner, Robert, ed (2001 [1998]). The Victory of Seapower. Caxton Editions. ISBN 1-84067-359-1.
- James, William (2002 [1827]). The Naval History of Great Britain, Volume 4, 1805–1807. Conway Maritime Press. ISBN 0-85177-908-5.
- James, William (2002 [1827]). The Naval History of Great Britain, Volume 5, 1808–1811. Conway Maritime Press. ISBN 0-85177-909-3.
- Mostert, Noel (2007). The Line upon a Wind: The Greatest War Fought at Sea Under Sail 1793 – 1815. Vintage Books. ISBN 978-0-7126-0927-2.
- Rodger, N.A.M. (2004). The Command of the Ocean. Allen Lane. ISBN 0-7139-9411-8.
- Woodman, Richard (2001). The Sea Warriors. Constable Publishers. ISBN 1-84119-183-3.
The original article can be found at Allemand's expedition of 1805 and the edit history here.