| 6th Anti-Aircraft Brigade 102 Anti-Aircraft Brigade | |
|---|---|
| Active | 1940–48 |
| Country |
|
| Branch |
|
| Type | Anti-Aircraft Brigade |
| Role | Air Defence |
| Part of |
North Western Expeditionary Force 6 AA Division 2 AA Group GHQ Reserve 3 AA Group 9 AA Group 1 AA Group |
| Garrison/HQ | RAF Debden (1940–43) |
| Engagements |
Norwegian Campaign Battle of Britain The Blitz Operation Diver |
6th Anti-Aircraft Brigade (6 AA Bde) was an air defence formation of the British Army formed during World War II. It served in the disastrous Norwegian Campaign in 1940 and then defended East Anglia during the Battle of Britain and The Blitz. It was reorganised to take part in the invasion of Normandy (Operation Overlord), but instead was diverted to defending Southern England against V-1 flying bombs (Operation Diver). It was briefly recreated in the postwar Regular Army.
Norway[]
Germany invaded Norway on 9 April 1940, and British and French forces launched a hastily-planned and badly-executed operation to intervene. Because the bulk of Britain's Regular Army had already deployed to France, most of the troops available for the Norwegian Campaign were part-time soldiers of the Territorial Army (TA). After a failed attempt to seize Trondheim, the main Allied objective became the port of Narvik. A base was established on the island of Harstad just outside Narvikfjord, and an airstrip at Skånland on the opposite coast, with an anti-aircraft (AA) allocation of light (LAA) and heavy (HAA) guns of the Royal Artillery (RA). 6th Anti-Aircraft Brigade HQ was assembled under the command of Brigadier F.N.C. Rossiter and sent to coordinate the AA defence of these bases.[1][2]
Order of Battle[]
Royal Artillery Bofors gun and crew at Harstad, 14 May 1940.
By early May, 6 AA Bde had the following order of battle:[1][2][3][4][5]
- 51st (London) HAA Regiment (TA)[6][7]
- 151, 152, 153 HAA Batteries (23 x 3.7-inch guns)
- 82nd (Essex) HAA Rgt (TA)[8][9]
- 156, 193, 256 HAA Btys, (24 x 3.7-inch)
- 55th (Devon) LAA Rgt (TA)[10][11]
- 163, 164, 165 LAA Btys, (36 x Bofors 40 mm guns)
- 56th (East Lancashire) LAA Rgt (TA)[12][13]
- 157 LAA Bty only (10 x Bofors)
- 3rd LAA Bty (Regular) (10 x Bofors) (later under command of 56th LAA Rgt)
- No 10 Army Observer Unit
All these units were short of their establishment of men, instruments and vehicles.
Deployment[]
On 14 May the General Officer Commanding (GOC), Lieutenant-General Claude Auchinleck, told London that he needed 104 x 3.7-inch guns and 96 x 40mm to hold Narvik and Tromsø, the latter having been added to the commitments. The Chiefs of Staff allowed him only 48 HAA and 72 LAA guns. 6 AA Brigade HQ therefore allocated its force as follows:[2]
- Harstad/Skånland: 24 HAA and 18 LAA guns (from 51 HAA and 55 LAA Rgts)
- Bardufoss airfield: 8 HAA and 12 LAA guns (a Bty of 82 HAA and Trps from 3 and 55 LAA)
- Tromsø and Sørreisa: 8 HAA and 12 LAA guns (a Bty of 82 HAA and 167/56 LAA Bty)
- Supporting French force at Gratangen: 12 LAA guns (Trps of 3, 163, 165 LAA Btys)
- Bodø force: 8 HAA and 14 LAA guns (from 51 HAA and 55 LAA Rgts)
This deployment was gradually carried out during May, with some adjustments. 153/51st HAA Bty intended for Bodø was embarked but never sailed. Two troops of 40mm guns were sent to the blocking force at Mosjøen, but one was later withdrawn. All movements had to be carried our along steep narrow roads banked with six feet of snow, or on boats that could not take a 3.7-inch gun. On 9 May, for example, 3rd LAA Bty had its HQ and two guns at Harstad, two guns at Skaanstad, two struggling up the mountains to Bardufoss, and a troop of four fighting off dive-bombers attacking the French at Gratangen – a total spread of 80 miles of land and water.[2]
The campaign[]


Damage at Harstad after a German air raid.
As soon as the brigade was deployed its units were in action as the Luftwaffe made almost daily attacks on shipping in the fjord. 152/51st HAA Battery reported firing barrages, and on one occasion fired for four hours continuously.[1] The Luftwaffe concentrated its air attacks on the AA defences: the Troop of 164/55th LAA Bty at Mosjøen fought its way back overland, with the loss of two of its guns to air attack. As soon as 40 mm positions were detected, the Luftwaffe bombers flew higher, while fighters picked off the AA guns. With high mountains and low cloud, early warning cover was poor, with just a single RAF radar post on the Lofoten Islands, and the Army AA units had to rely on information from radar-equipped warships, which provided most of the AA cover in Narvikfjord.[14]
A Bofors Troop of 55th LAA Rgt re-embarked for Mo with 24 Guards Brigade and on landing moved to Stein to block the German forces coming from the south to relieve Narvik. The Germans attacked on 17 May but the little force held. Over succeeding days, however, it was forced back and eventually evacuated from Bodø on 31 May.[15] The Allies launched an attack at Narvik on 17 May by French, Polish and Norwegian troops, supported by British artillery, including Troops of 3rd LAA Bty and 55th LAA Rgt. The guns of 2 Trp, 3 LAA Bty under French control played a major part in breaking up a strong German ground counter-attack, and then shot down an aircraft. The final attack went in on 27 May and the town was secured the following day. However, immediately after its capture, orders were received to destroy the port and evacuate to the UK. (The British Expeditionary Force in France was simultaneously being evacuated from Dunkirk.)[14][15]
To cover the evacuation, AA units were ordered to maintain maximum activity and especially to prevent reconnaissance overflights. At the same time, 6 AA Bde was ordered by London to recover its 3.7-inch and 40mm guns as a matter of priority. This was done by progressively thinning out defences. The Bodø force was evacuated at night by naval destroyers after a 100-plus German air raid destroyed the town and airstrip: all equipment there had to be abandoned. However, 6 AA Bde was able to assemble from the outlying positions 22 Bofors and five HAA guns at Harstad, with a number of predictors and heightfinders. 55th LAA Regiment saved all its Bofors guns. 6 AA Brigade ended all AA defence on 6 June.[14]
By 8 June the British troops had embarked with their surviving equipment and the convoy sailed for the UK, still under air attack.[16]
Battle of Britain[]
On return from Norway, 6 AA Bde HQ joined Anti-Aircraft Command, the predominantly TA force charged with air defence of the United Kingdom. On 29 June Brigade HQ was ordered to proceed to RAF Debden. Initially it was assigned to 2 AA Division covering East Anglia and the East Midlands. On 4 July it was given command of 32nd (7th London) AA Battalion,[17] a Royal Engineers (RE) searchlight (S/L) unit transferred from 41 AA Bde, and 49th LAA Regiment, RA,[18] which was newly forming. Shortly afterwards the brigade was transferred to the command of 6 AA Division and gained two regiments from that formation: 12th (Finsbury Rifles) LAA Regiment[19][20] from 56 Light AA Bde and 33rd (St Pancras) AA Bn.[21] From now on, 6 AA Bde operated as a light AA formation in southern East Anglia, commanding widely spaced S/L sites and LAA guns scattered at vulnerable points (VPs), mainly RAF airfields.[17][22][23][24]
In August 1940, the AA Bns of the Royal Engineers were transferred to the Royal Artillery, when they were designated Searchlight (S/L) Regiments.[17][24][25]
The Luftwaffe began massed raids against RAF fighter airfields in August (the Battle of Britain), but these were mainly in South East England, outside 6 AA Bde's area of responsibility. However, RAF Debden itself was heavily attacked on 26 and 31 August, resulting in heavy damage. In September the attacks shifted to London.[24][26]
The Blitz[]
As the battle continued into the night bombing of The Blitz, the brigade's S/L batteries deployed across East Anglia frequently engaged enemy bombers crossing to raid London and the industrial Midlands, and developed cooperation with RAF Night fighter units operating from Debden. The S/L layouts had been based on a spacing of 3500 yards (3200 m), but due to equipment shortages this had to be extended to 6000 yards (5500 m) by September 1940. In November this was changed to clusters of three lights to improve illumination, but this meant that the clusters had to be spaced 10,400 yards (9500 m) apart. The cluster system was an attempt to improve the chances of picking up enemy bombers and keeping them illuminated for engagement by AA guns or night fighters. Eventually, one light in each cluster was to be equipped with Searchlight Control (SLC) radar and act as 'master light', but the radar equipment was still in short supply and did not make its appearance until April 1941.[17][27][28]


6 AA Divisional sign.
Order of Battle 1940–41[]
During this period the brigade was constituted as follows:[22][23][29][30][31]
- 12th (Finsbury Rifles) LAA Rgt – to 8 AA Division by May 1941
- 34, 35, 36 LAA Btys
- 49th LAA Rgt
- 84, 90, 119 LAA Btys
- 32nd (7th London) S/L Rgt[32][33]
- 328, 329, 330 S/L Btys
- 33rd (St Pancras) S/L Rgt[32][34]
- 332, 333, 334 S/L Btys
Mid-War[]
The Blitz ended in May 1941, but occasional raids continued. Newly formed units joined AA Command, the HAA and supporting units increasingly being 'mixed' ones into which women of the Auxiliary Territorial Service (ATS) were integrated. At the same time, experienced units were posted away for service overseas. This led to a continual turnover of units, which accelerated in 1942 with the preparations for Operation Torch and the need to transfer AA units from North West England to counter the Baedeker Blitz and Luftwaffe hit-and-run attacks against South Coast towns.[35] The widespread introduction of SLC permitted the 'declustering' of the S/L units into 'Indicator Belts' of lights at 10,400 yard spacing and 'Killer Belts' at 6000 yard spacing cooperating with night fighters.[36][37]
Order of Battle 1941–42[]
During this period the brigade was composed as follows:[31][38][39][40]
- 121st HAA Rgt[41] – joined from 29 (East Anglian) AA Bde February 1942
- 385 HAA Bty – attached to 71 AA Bde from August 1942
- 387, 388 HAA Btys
- 413 HAA Bty – joined from 85th (Tees) HAA Rgt July 1942
- 34th LAA Rgt – joined April 1942; to 50th (Northumbrian) Infantry Division May 1942 [42][43]
- 65, 92, 246 LAA Btys
- 49th LAA Rgt – to 28 (Thames & Medway) AA Bde June 1942
- 84, 90 LAA Btys
- 280 LAA Bty – attached to 37 AA Bde from March 1942
- 298 LAA Bty – attached to 37 AA Bde from March 1942; to 133rd LAA Rgt April 1942
- 452 LAA Bty – new bty joined March 1942
- 131st LAA Rgt – converted from 81 S/L Rgt in 29 AA Bde; joined April 1942 but rostered for overseas service and left soon afterwards[44][45]
- 432, 433, 434, 435 LAA Btys
- 32nd S/L Rgt – to 56 LAA Bde August 1942
- 328, 330 S/ Btys – attached to 27 (Home Counties) AA Bde, from March 1942, then 56 LAA Bde from June 1942
- 329 S/L Bty
- 526 S/L Bty joined from 86th S/L Rgt by December 1941
- 33rd S/L Rgt
- 332, 333, 334 S/L Btys
- 543 S/L Bty – joined from 89th S/L Rgt January 1942, attached to 56 LAA Bde from March 1942
- 6 AA Brigade Signal Office Mixed Sub-Section (part of 6 AA Divisional Signals, Royal Corps of Signals)
- 6 AA Brigade Group, ATS
A reorganisation of AA Command in October 1942 saw the AA divisions disbanded and replaced by a number of AA Groups more closely aligned with the groups of RAF Fighter Command. 6 AA Brigade joined 2 AA Group.[23][46][47] At this point 6 AA Bde consisted only of 121st HAA (413 HAA Bty leaving in November) and 33rd S/L Rgts, but was joined for a month in November by 125th (Cameronians) LAA Rgt[48][49] (417, 418, 419 LAA Btys) and then by 129th (1st Surrey Rifles) LAA Rgt[50][51] (425, 426, 427, 455 LAA Btys). In April 1943, 121st HAA Rgt was replaced by the newly formed 198th HAA Rgt (634, 635, 636 HAA Btys),[52][53] and 33rd S/L Rgt left for 27 AA Bde on 10 April 1943.[40]
102 AA Brigade[]
On 1 May 1943 the brigade was redesignated 102 Anti-Aircraft Brigade, when it left AA Command and became part of the General Headquarters (GHQ) Reserve. The reorganised brigade now formed part of the field force being trained for the Allied invasion of Normandy (Operation Overlord). It consisted of two mobile HAA regiments: 121st HAA Rgt returned to its command and it was joined by 110th HAA Rgt[54] (345, 346, 354 HAA Btys) and had 3 Composite LAA/SL Bty attached.[53][55]
When field force AA units and formations were not engaged in mobile training, they were loaned back to AA Command for Home Defence. In March 1944, 102 AA Bde joined 3 AA Group in AA Command in South West England, moving back to 2 AA Group in South East England the following month.[56][57]
Order of Battle March 1944[]
At this point 102 AA Bde HQ had the following units under command:[56][57]
- 124th HAA Rgt
- 219, 410, 412, 415 HAA Btys
- 136th HAA Rgt
- 182, 409, 432, 468 HAA Btys
- 138th HAA Rgt
- 419, 424, 437, 438 HAA Btys
- 95th LAA Rgt
- 263, 294, 297, 302 LAA Btys
- 97th LAA Rgt
- 221, 232, 301, 480 LAA Btys
- 98th LAA Rgt
- 305, 306, 481 LAA Btys
- 143rd LAA Rgt – joined April, left July 1944
- 403, 410, 413 LAA Btys
However, all these units except the newly arrived 143rd LAA Rgt left the brigade in May, and it was joined by 183rd (Mixed) HAA Rgt (564, 591, 608, 640 HAA Btys).[57]
Operation Diver[]
Shortly after Operation Overlord began on D-Day, the Germans began launching V-1 flying bombs, codenamed 'Divers', against London. These presented AA Command's biggest challenge since the Blitz. Defences had been planned against this new form of attack (Operation Diver), but it presented a severe problem for AA guns, and after two weeks' experience AA Command carried out a major reorganisation, stripping guns from the Midlands and repositioning them along the South Coast to target V-1s coming in over the English Channel. In July 1944, 102 AA Bde was among the formations sent to reinforce the AA defences along the South East coast. The brigade HQ was responsible for one of the six sectors of a new belt of anti-Diver defences under 2 AA Group.[58][59]
Orders of Battle Summer 1944[]


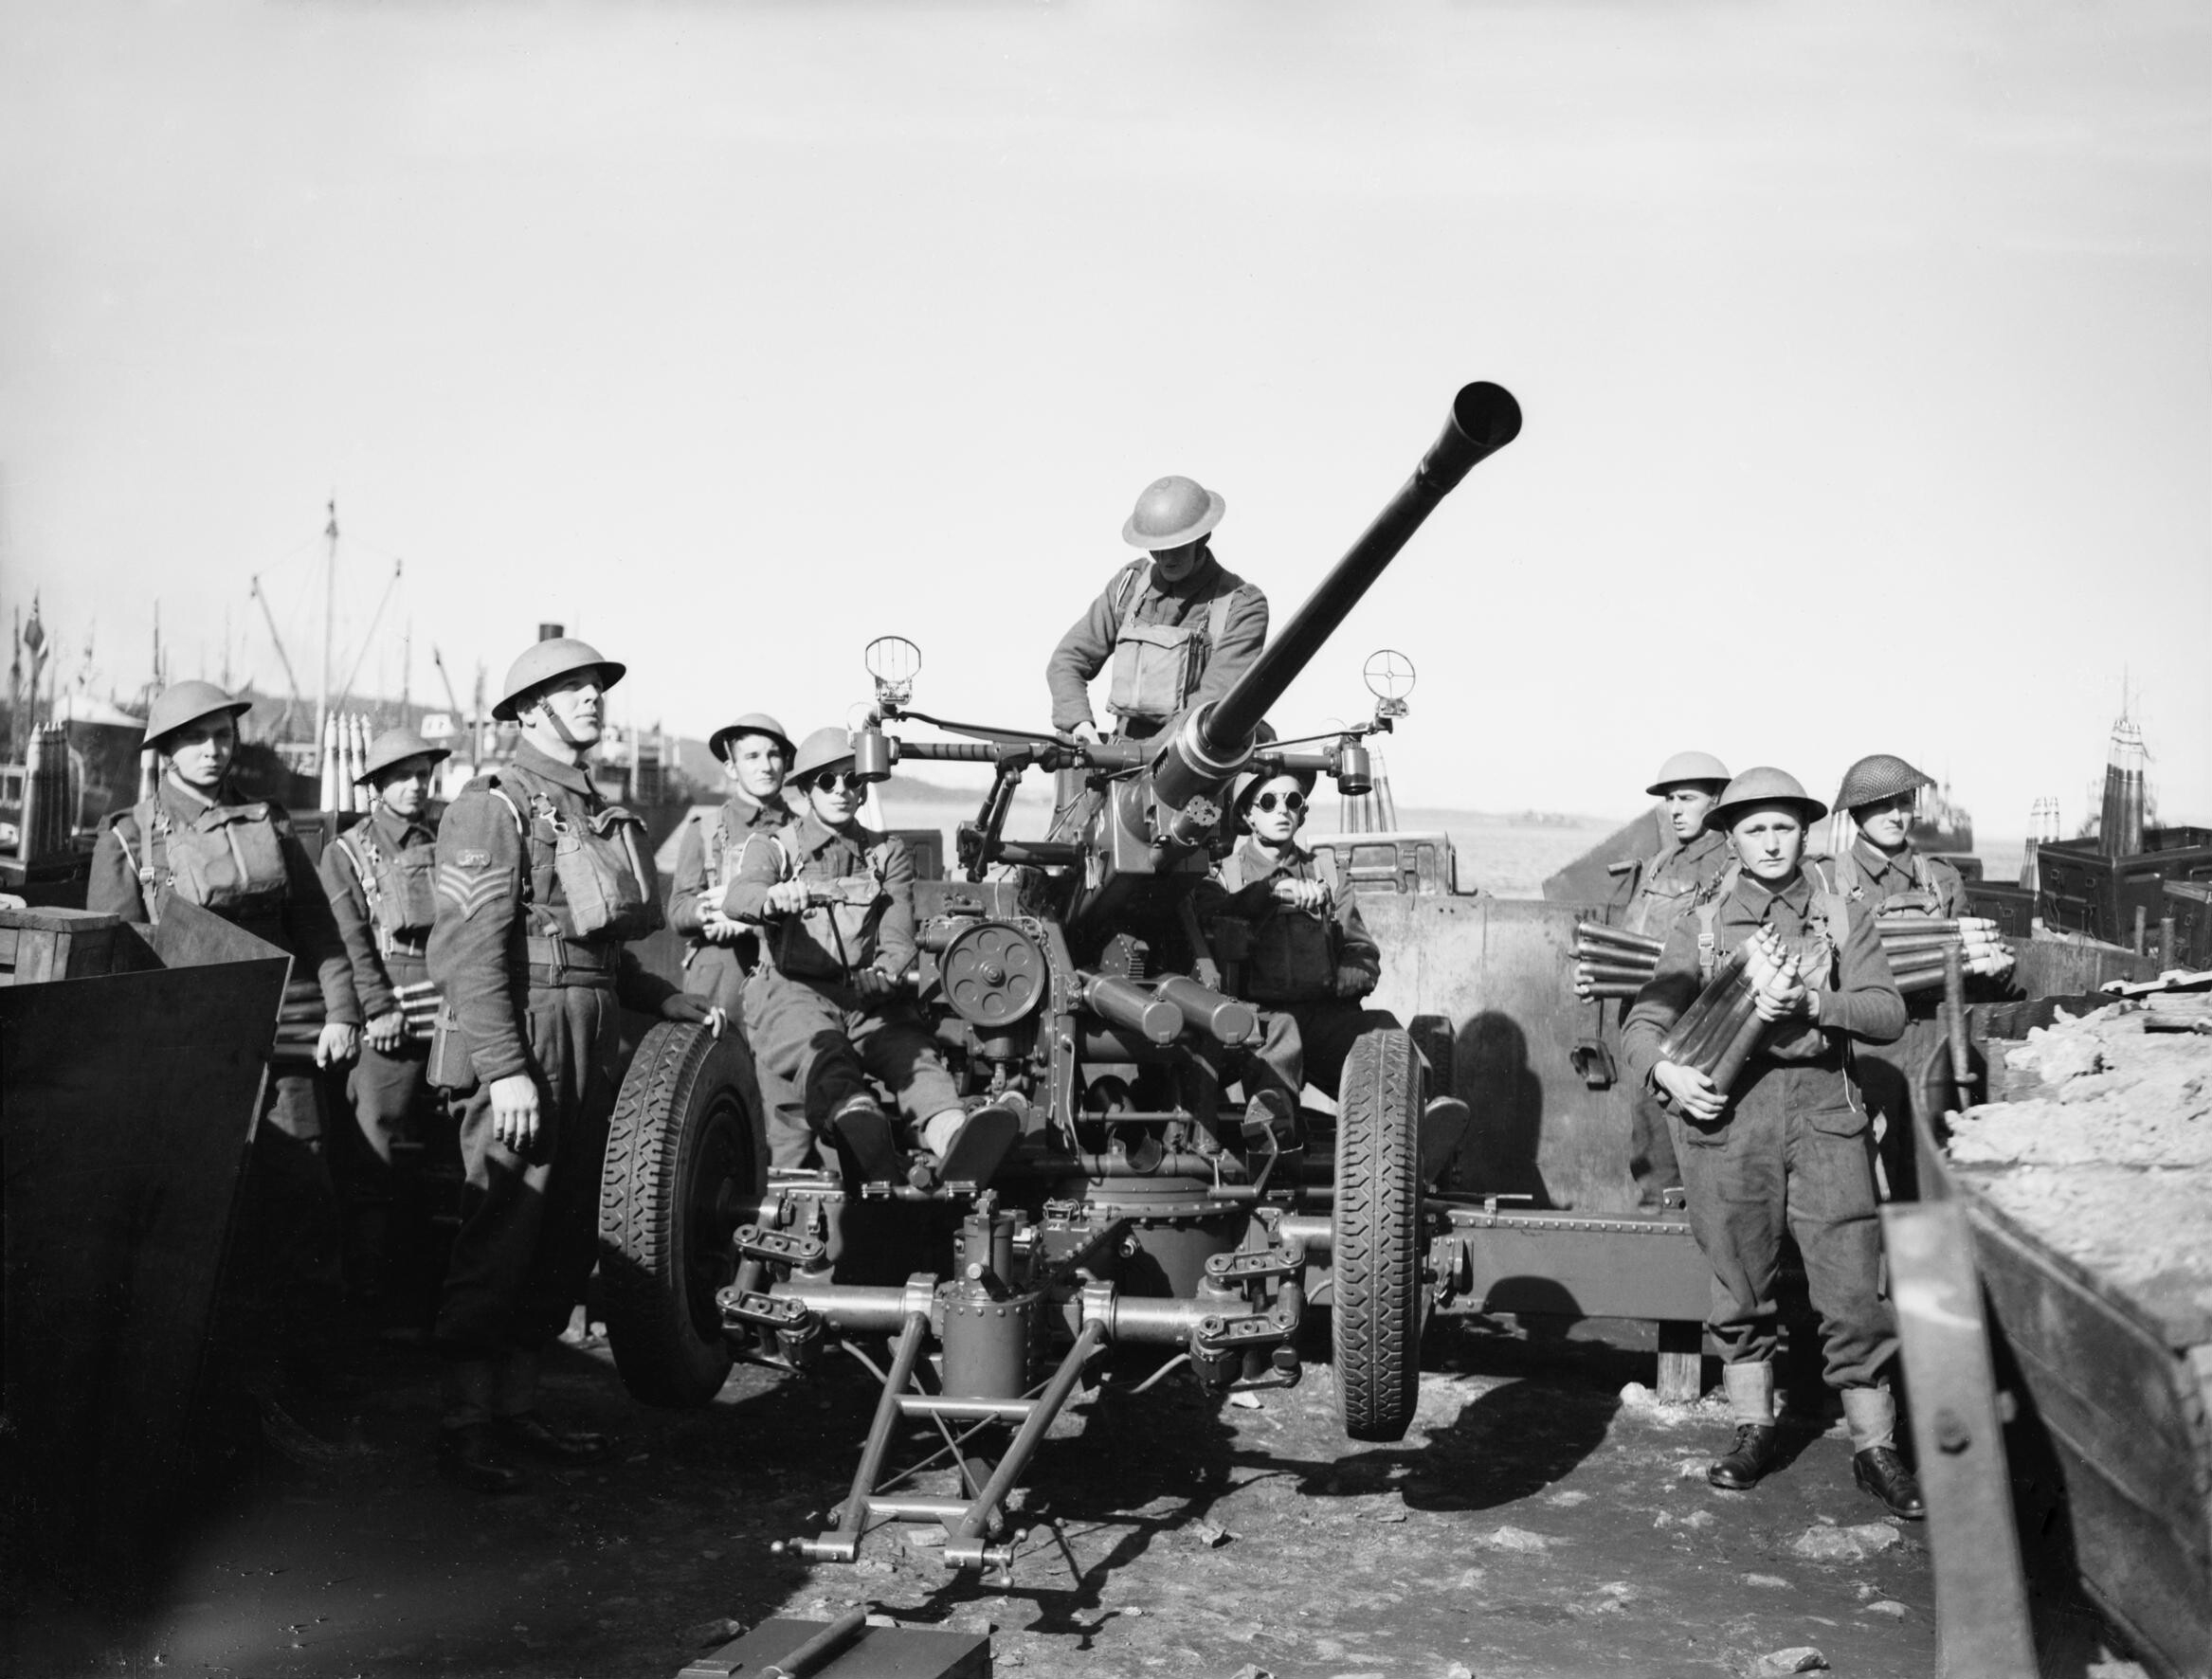
Bofors guns at a South Coast anti-Diver battery, August 1944.
During this period the brigade was composed as follows:[57]
- 19th LAA Rgt[60][61]
- 221, 263, 294 LAA Btys
- 88th LAA Rgt
- 178, 289, 293 LAA Btys
- 97th LAA Rgt - see above
- 232, 301, 480 LAA Btys
- 98th LAA Rgt - see above
- 305, 306, 481
- 129th (1st Surrey Rifles) LAA Rgt - see above
- 425, 426, 427, 455 LAA Btys
- 135th LAA Rgt
- 445, 447, 450 LAA Btys
- 140th LAA Rgt
- 457, 459, 464 LAA Btys
There were further radical reorganisations of the Diver defences in August and through the autumn of 1944, giving the brigade the following composition:[57]


3.7-inch guns at a South Coast anti-Diver battery, July 1944.
- 119th HAA Rgt – joined in December 1944
- 372, 377, 378 HAA Btys
- 122nd HAA Rgt – left in September 1944
- 397, 400, 410 HAA Btys
- 132nd (M) HAA Rgt – to Diver defences of Brussels December 1944[62]
- 435, 450, 457, 469 HAA Btys
- 134th (M) HAA Rgt – joined in September, left by December 1944
- 459, 460, 461, 583 HAA Bty
- 189th (M) HAA Rgt – joined in November, to Diver defences of Brussels December 1944[62]
- 434, 440, 663 HAA Btys
- 85th LAA Rgt – joined in September, left by December 1944
- 52, 201, 304, 448 LAA Btys
- 98th LAA Rgt – left in November 1944
- 129th (1st Surrey Rifles) LAA Rgt – as above
- 425, 426, 427, 455 LAA Btys
- 131st LAA Rgt – as above; left in September 1944
- 432, 433, 434 LAA Btys

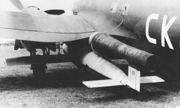
V-1 slung under the wing of a Heinkel He 111 bomber.
* 134th LAA Rgt – joined in November 1944
- 192, 275, 287, 475 LAA Btys
- 136th LAA Rgt – joined in November, left by December 1944
- 386, 453, 474 LAA Btys
- 140th LAA Rgt – left by December 1944
- 142nd LAA Rgt – joined in December 1944
- 374, 498, 465 LAA Btys
- 151st LAA Rgt – joined in November, left by December 1944
- 449, 472, 478 LAA Btys
In October 1944, the brigade's HQ establishment was 11 officers, 10 male other ranks and 28 members of the ATS, together with a small number of attached drivers, cooks and mess orderlies (male and female). In addition, the brigade's Mixed Signal Office Section comprised 1 officer, 5 male other ranks and 19 ATS, which was formally part of the Group signal unit [63]


A Nissen hut being erected at an AA site, November 1944.
As the V-1 launching sites in Northern France were overrun by 21st Army Group, the Luftwaffe began air-launching V-1s from the North Sea, and further AA units had to be repositioned along the East Coast. AA Command formed a new 9 AA Group to control the units in East Anglia, and 102 AA Bde came under its command in December 1941. New HAA sites had to be quickly established, with static guns mounted on ingenious 'Pile Platforms' (named after the commander of AA Command, Sir Frederick Pile) and thousands of huts moved and re-erected to shelter the crews as winter approached.[58][59]
During the winter of 1944–45, the Belgian cities of Brussels and Antwerp were bombarded with V-1s, and a number of Mixed HAA regiments were stripped from AA Command and sent to provide anti-Diver defences.[62]
At the end of 1944 the Luftwaffe was suffering from such shortages of pilots, aircraft and fuel that serious aerial attacks on the UK could be discounted. At the same time 21st Army Group fighting in North West Europe was suffering a severe manpower shortage, particularly among the infantry. Large numbers of AA gunners and whole units were converted into infantry, and the strength of AA Command dwindled.[58][64] By February 1945, the brigade only had 119th HAA Rgt, 140th HAA Rgt (418, 420, 429 HAA Btys) and 129th LAA Rgt under command. In March March, 119th HAA Rgt went to 26 AA Bde and was replaced by 157th HAA Rgt (415, 430, 438 HAA Btys). In April 129th LAA left and was replaced by the return of 19th LAA Rgt.
After VE Day, AA Command was rapidly run down, and both 9 AA Group and 102 AA Bde quickly disappeared from the order of battle.[57]
Postwar[]
At the end of World War II, AA Command drew up a 10-year plan for the air defence of the UK. This included a reformed 6 AA Bde based at Brentwood, Essex in 1 AA Group covering London, Thames, Medway, Harwich and Dover, with the following Regular Army units in its order of battle:[65][66]
- 57th HAA Rgt (the wartime 20th Anti-Tank Rgt) at Orsett Camp, Grays, Essex (5.25-inch guns)[67]
- 104, 108, 160, 204 HAA Btys
- 100th HAA Rgt (the wartime 162nd HAA Rgt) at Grays[68]
- 259, 281, 317 HAA Btys
- 107th HAA Rgt (the wartime 153rd HAA Rgt) at Grays[68]
- 301, 307, 311 HAA Btys
- 30 Fire Control Troop
However, the 1947 plan was never fully implemented and 100th and 107th HAA Rgts were disbanded during 1948.
References[]
- T.K. Derry, History of the Second World War: The Campaign in Norway, London, HM Stationery Office, 1952.
- Major L.F. Ellis, History of the Second World War, United Kingdom Military Series: Victory in the West, Vol II: The Defeat of Germany, London: HM Stationery Office, 1968/Uckfield: Naval & Military, 2004, ISBN 1-845740-59-9.
- Gen Sir Martin Farndale, History of the Royal Regiment of Artillery: The Years of Defeat: Europe and North Africa, 1939–1941, Woolwich: Royal Artillery Institution, 1988/London: Brasseys, 1996, ISBN 1-85753-080-2.
- Lt-Col H.F. Joslen, Orders of Battle, United Kingdom and Colonial Formations and Units in the Second World War, 1939–1945, London: HM Stationery Office, 1960/Uckfield: Naval & Military Press, 2003, ISBN 1-843424-74-6.
- Norman E.H. Litchfield, The Territorial Artillery 1908–1988 (Their Lineage, Uniforms and Badges), Nottingham: Sherwood Press, 1992, ISBN 0-9508205-2-0.
- C. Digby Planck, History of the 7th (City of London) Battalion London Regiment, London: Old Comrades' Association, 1946/Uckfield: Naval & Military Press, 2002, ISBN 1-84342-366-9.
- Brig N.W. Routledge, History of the Royal Regiment of Artillery: Anti-Aircraft Artillery 1914–55, London: Royal Artillery Institution/Brassey's, 1994, ISBN 1-857753-009-3.
- Col J.D. Sainsbury, The Hertfordshire Yeomanry Regiments, Royal Artillery, Part 2: The Heavy Anti-Aircraft Regiment 1938–1945 and the Searchlight Battery 1937–1945, Welwyn: Hertfordshire Yeomanry and Artillery Trust/Hart Books, 2003, ISBN 0-948527-06-4.
External sources[]
Notes[]
- ↑ 1.0 1.1 1.2 Farndale, p. 27.
- ↑ 2.0 2.1 2.2 2.3 Routledge, p. 110.
- ↑ Derry, Appendix B, p. 267.
- ↑ Farndale, Annex C.
- ↑ Joslen, p. 461.
- ↑ Litchfield, p. 163.
- ↑ 51 HAA Rgt at RA 39–45.
- ↑ Litchfield, p. 71.
- ↑ 82 HAA Rgt at RA 39–45.
- ↑ Litchfield, p. 43.
- ↑ 55 LAA Rgt at RA 39–45.
- ↑ Litchfield, p. 116.
- ↑ 56 LAA Rgt at RA 39–45.
- ↑ 14.0 14.1 14.2 Routledge, p. 111.
- ↑ 15.0 15.1 Farndale, p. 28.
- ↑ Routledge, p. 112.
- ↑ 17.0 17.1 17.2 17.3 Planck, pp. 230–1.
- ↑ 49 LAA Rgt at RA 39–45.
- ↑ Litchfield, p. 168.
- ↑ 12 LAA Rgt at RA 39–45.
- ↑ Sainbsury, Chapter 5.
- ↑ 22.0 22.1 Routledge, Table LXV, p. 396.
- ↑ 23.0 23.1 23.2 6 AA Division 1940 at British Military History.
- ↑ 24.0 24.1 24.2 Sainsbury, pp. 134–5.
- ↑ Litchfield, p. 5.
- ↑ Routledge, pp. 383–6.
- ↑ Routledge, pp. 388-9, 393.
- ↑ Sainsbury, p. 137.
- ↑ Farndale, Annex D.
- ↑ 6 AA Division 1940 at RA 39–45.
- ↑ 31.0 31.1 Order of Battle of Non-Field Force Units in the United Kingdom, Part 27: AA Command, 12 May 1941, with amendments, The National Archives (TNA), Kew, file WO 212/79.
- ↑ 32.0 32.1 Litchfield, p. 170.
- ↑ 32 S/L Rgt at RA 39–45.
- ↑ 33 S/L Rgt at RA 39–45.
- ↑ Routledge, pp. 399–404.
- ↑ Routledge, p. 399.
- ↑ Sainsbury, pp. 140–42.
- ↑ Order of Battle of Non-Field Force Units in the United Kingdom, Part 27: AA Command, 2 December 1941, with amendments, TNA file WO 212/80.
- ↑ Order of Battle of Non-Field Force Units in the United Kingdom, Part 27: AA Command, 14 May 1942, with amendments, TNA file WO 212/81.
- ↑ 40.0 40.1 Sainsbury, p. 144.
- ↑ 121 HAA Rgt at RA 39–45.
- ↑ Joslen, p. 81.
- ↑ 34 LAA Rgt at RA 39–45.
- ↑ Farndale, Annex M.
- ↑ 131 LAA Rgt at RA 39–45.
- ↑ AA Command 1940 at British Military History
- ↑ Sainsbury, p. 143.
- ↑ Litchfield, p. 290.
- ↑ 125 LAA Rgt at RA 39–45.
- ↑ Litchfield, p. 173.
- ↑ 129 LAA Rgt at RA 39–45.
- ↑ Order of Battle of Non-Field Force Units in the United Kingdom, Part 27: AA Command, 1 October 1942, with amendments, TNA file WO 212/82.
- ↑ 53.0 53.1 Order of Battle of Non-Field Force Units in the United Kingdom, Part 27: AA Command, 13 March 1943, with amendments, TNA file WO 212/83.
- ↑ 110 HAA Rgt at RA 39–45.
- ↑ Order of Battle of the Field Force in the United Kingdom, Part 3: Royal Artillery (Non-Divisional Units), 18 February 1943, with amendments, TNA files WO 212/9 and WO 33/1987.
- ↑ 56.0 56.1 Order of Battle of AA Command, 1 August 1943, with amendments, TNA file WO 212/84.
- ↑ 57.0 57.1 57.2 57.3 57.4 57.5 Order of Battle of AA Command, 27 April 1944, TNA file WO 212/85.
- ↑ 58.0 58.1 58.2 Pile's despatch.
- ↑ 59.0 59.1 Routledge, pp. 408–19.
- ↑ Litchfield, p. 300.
- ↑ 19 LAA Rgt at RA 39–45.
- ↑ 62.0 62.1 62.2 Routledge, p. 338.
- ↑ AA Command Organisation Table, October–November 1944, TNA file WO 212/148.
- ↑ Ellis, pp. 141–2, 369, 380.
- ↑ Routledge, Table LXXIV, p. 441.
- ↑ Watson, TA 1947
- ↑ 53–59 Rgts RA at British Army 1945 on.
- ↑ 68.0 68.1 100–110 Rgts RA at British Army 1945 onwards.
The original article can be found at 6th Anti-Aircraft Brigade (United Kingdom) and the edit history here.