| Plymouth Brigade Devon & Cornwall Brigade 130th (Devon & Cornwall) Brigade 130th Infantry Brigade 130th (West Country) Infantry Brigade | |
|---|---|
 Formation patch of the 43rd Division, World War II | |
| Active | 1889–1961 |
| Country |
|
| Branch |
|
| Type | Infantry |
| Size | Brigade |
| Part of | 43rd (Wessex) Division |
| Engagements |
Operation Jupiter (Hill 112) Operation Bluecoat (Mont Pinçon) Vernon Bridge Operation Market Garden Operation Clipper Operation Blackcock Operation Veritable Operation Plunder |
| Commanders | |
| Notable commanders |
Col the Earl Mount Edgcumbe Col Lord Clifford of Chudleigh Brig Basil Coad |
The 130th (Devon & Cornwall) Brigade, originally the Plymouth Brigade was an infantry formation of Britain's Volunteer Force, Territorial Force, and later Territorial Army (TA). In World War I the brigade was in British India for most of the war and did not see service as a complete formation, but many of its battalions fought in the Middle East campaigns. The brigade (without its Devon or Cornwall battalions) did see action during the campaign in North West Europe of World War II, distinguishing itself at actions such as Operation Jupiter (Hill 112), the capture of Mont Pinçon, Operation Market Garden, at 'Dorset Wood' and at Hengelo. As 130 (West Country) Brigade it continued in the postwar TA until 1961.
Volunteer Force[]
The Stanhope Memorandum of December 1888 proposed a comprehensive Mobilisation Scheme for the part-time Volunteer units, which would assemble in their own brigades at key points in case of war. In peacetime these Volunteer Infantry Brigades provided a structure for collective training.[1][2] On 9 February 1889 Lieutenant-Colonel the Earl Mount Edgcumbe, commanding officer (CO) of the 2nd (Prince of Wales's) Volunteer Battalion, Devonshire Regiment, was appointed Colonel in command of the Plymouth Brigade, consisting of the volunteer battalions of the Devons[lower-alpha 1]and the Duke of Cornwall's Light Infantry (DCLI), which was charged with defending the Royal Navy's base at Plymouth. The brigade commander was assisted by a retired Regular officer acting as Brigade major. Later staff appointments were filled by officers from the volunteer battalions.[3][4] Lord Mount Edgcumbe commanded the Plymouth Brigade until 1893; he was succeeded as Colonel Commandant by a retired Regular officer, Major-General M.A.H.J. Heriot. By 1895 the Plymouth Brigade had the following organisation:[3]
- Headquarters (HQ): Ivybridge
- Brigade Commander: Maj-Gen M.A.H.J. Heriot
- Aide-de-camp: Captain E.C. Nicholetts, 3rd VB Devons
- Brigade Major: Major (retired) F.M. Eden
- Supply and Transport Officer: Maj L.E. Beare, VD, 5th VB Devons
- Brigade Surgeon-Lieutenant-Colonel: D. Thompson, 2nd VB DCLI
- 1st (Exeter and South Devon) Volunteer Battalion, Devonshire Regiment
- 2nd (Prince of Wales's) Volunteer Battalion, Devonshire Regiment
- 3rd Volunteer Battalion, Devonshire Regiment
- 4th Volunteer Battalion, Devonshire Regiment
- 5th (The Hay Tor) Volunteer Battalion, Devonshire Regiment
- 1st (Duke of Cornwall's) Volunteer Battalion, DCLI
- 2nd (Duke of Cornwall's) Volunteer Battalion, DCLI
- Supply Detachment, later designated an Army Service Corps (ASC) Company
- Bearer Company, later part of the Royal Army Medical Corps
Lewis, 9th Lord Clifford of Chudleigh, VD, the CO of the 5th (Hay Tor) VB, Devons, took command of the Plymouth Brigade as a Temporary Colonel in 1901, and shortly afterwards it was renamed the Devonshire Brigade when the HQ moved to Exeter and the two DCLI battalions transferred to the Cornwall & Somerset Brigade (also headquartered at Exeter).[3][5][6][7]
Territorial Force[]
When the Volunteers were subsumed into the new Territorial Force (TF) under the Haldane Reforms of 1908,[8] the brigade carried on as the Devon and Cornwall Brigade in the TF's Wessex Division. Lord Clifford continued in command and retained the temporary rank of colonel.[3][5][9] The reorganised brigade had the following composition:[3]
- HQ: Lennard Buildings, Goldsmith Street, Exeter
- 4th Bn Devonshire Regiment (from the former 1st & 3rd VBs) at Exeter[10]
- 5th (Prince of Wales's) Bn Devonshire Regiment (from the 2nd & 5th VBs) at Plymouth[10]
- 4th Bn Duke of Cornwall's Light Infantry (from the 1st VB) at Truro[11]
- 5th Bn Duke of Cornwall's Light Infantry (from the 2nd VB) at Bodmin[11]
- No 2 (Devon & Cornwall) Section, Wessex Divisional Signal Company, Royal Engineers
- Devon & Cornwall Brigade Company, ASC, at Mutley Barracks, Exeter
The 6th Battalion, Devonshire Regiment, (from the 4thVB[10]) at Barnstaple was not part of the brigade, but was designated as 'Army Troops' attached to the Wessex Division.[3]
World War I[]
On 29 July 1914 the Wessex Division was on Salisbury Plain carrying out its annual training camp when 'precautionary orders' were received, and next day the division took up emergency war stations in Somerset, Devon and Cornwall. The order to mobilise arrived on the evening of 4 August. Between 10 and 13 August the division concentrated on Salisbury Plain and began war training.[12][13]
On the outbreak of war, TF units were invited to volunteer for Overseas Service and on 15 August the War Office issued instructions to separate those men who had signed up for Home Service only, and form these into reserve units. On 31 August, the formation of a reserve or 2nd Line unit was authorised for each 1st Line unit where 60 per cent or more of the men had volunteered for Overseas Service. The titles of these 2nd Line units would be the same as the original, but distinguished by a '2/' prefix. In this way duplicate battalions, brigades and divisions were created, mirroring those TF formations being sent overseas.[14] The Duke of Cornwall's Light Infantry experienced a shortfall in volunteers, and so many Overseas Service men had to be transferred from the 1/5th DCLI to bring the 1/4th up to strength that the 1/5th was withdrawn from the Devon & Cornwall brigade and replaced by the 1/6th Devons on 16 September; 1/5th DCLI later became a pioneer battalion on the Western Front.[12][13][15]
On 24 September, at the special request of the Secretary of State for War, Earl Kitchener of Khartoum, the Wessex Division accepted liability for service in British India to relieve the Regular units there for service on the Western Front. The division's infantry battalions (without their brigade headquarters) embarked at Southampton on 8 October and the were convoyed to Karachi (the Devon battalions) and Bombay (1/4th DCLI). They were immediately distributed to garrisons across India, reverting to peacetime service conditions, and the Devon & Cornwall Brigade never saw service as a whole, though it was formally numbered the 130th (Devon and Cornwall) Brigade in May 1915.[12][13]
As soon as the Wessex Division had left for India, the 2nd Wessex Division and its brigades began to be organised from the 2nd Line battalions being raised by the home depots. Recruitment and training of the 2nd Wessex Division proceeded so well that it was also sent to India in December 1914, and later received the notional titles of 45th (2nd Wessex) Division and 136th (2/1st Devon and Cornwall) Brigade.[16][17] Brigadier-General R.J. Pinney, who had commanded the Devon & Cornwall Brigade since 16 July 1913, took temporary command of the 2nd Wessex Division on its formation and Brig-Gen Lord St Levan (a retired colonel in the Grenadier Guards) commanded the 2/1st Devon and Cornwall Brigade until it embarked for India.[3][16] By early 1915 the need was growing for troops to be sent from India to various theatres of war, and the first drafts and formed units from the Wessex Divisions began to go on active service, particularly to the Mesopotamian Front. By the end of the war only one battalion remained in India from the two Devon & Cornwall brigades.[12][13][16][17]
Interwar[]
The TF (reorganised as the Territorial Army (TA) in 1921) began to reform on 7 February 1920. 130th (Devon and Cornwall) Infantry Brigade in 43rd (Wessex) Division was composed as follows:[3][18]
- 4th Bn Devons
- 5th Bn Devons
- 6th Bn Devons
- 4th/5th Bn DCLI (amalgamated 1921)[11]
World War II[]
Mobilisation[]
After the Munich Crisis in late 1938, when the possibility of another European conflict loomed, the TA was doubled in size, and once again its units formed duplicates. The TA's infantry units mobilised on 1 September 1939, two days before war was declared.[10] At the time of mobilisation the duplicate 45th Division was still being organised, so both 1st and 2nd Line units were administered by 43rd (Wessex) Division HQ. Once the two were separated, the Devon and DCLI battalions were all assigned to 45th Division and 130th Infantry Brigade (the 'Devon and Cornwall' subtitle having been dropped) in 43rd (W) Division had the following organisation:[19][20][21][22]
- 4th Battalion, Dorset Regiment
- 5th Battalion, Dorset Regiment
- 7th Battalion, Hampshire Regiment
- 130th Infantry Brigade Anti-Tank Company – formed 17 May 1940, disbanded 20 December 1941
- Section, No 3 Company, 43rd (Wessex) Divisional Signals, Royal Corps of Signals (RCS) [23]
Home Defence[]
In May 1940 43rd (W) Division was preparing to go overseas to join the British Expeditionary Force (BEF) in France, but the German invasion of the Low Countries on 10 May ended the 'Phoney War' before the division was ready.[21] When the Battle of France was lost and the BEF was being evacuated from Dunkirk, 43rd (W) Division was one of the few reasonably well-equipped formations left in Home Forces to counter a German invasion of the United Kingdom. It formed part of the mobile GHQ Reserve disposed on the line from Northampton through North London to Aldershot, from which brigade groups could be despatched to any threatened area. During the period when invasion was most feared, the division was stationed just north of London.[24][25] [26][27] By the end of 1940 the division was stationed in East Kent, where it remained for the next four years, first in defensive mode, later training intensively for the Allied invasion of Normandy (Operation Overlord). It was later noted that its habitual training area round Stone Street, Kent, bore a marked resemblance to the Bocage countryside in Normandy where it would later fight.[21][28][29][30]
Normandy[]
130th Brigade landed in Normandy on 24 June 1944,[20][31] and for the rest of the North West Europe campaign its normal organisation for mobile operations was as follows:[32][33]
130 Infantry Brigade Group
- Brigade HQ
- Three infantry battalions
- One machine gun company and one heavy mortar platoon from 8th Bn Middlesex Regiment
- 112th (Wessex) Field Regiment, Royal Artillery
- 233rd A/T Battery, 59th (Duke of Connaught's Hampshire) Anti-Tank Regiment, Royal Artillery
- One self-propelled (SP) troop from 361 LAA Battery, 110th Light Anti-Aircraft Regiment, Royal Artillery
- 553rd Field Company, Royal Engineers
- Section, No 3 Company, 43rd (Wessex) Divisional Signals
- 130th Field Ambulance, Royal Army Medical Corps
- 505th Company, Royal Army Service Corps – in the divisional administrative area
- 130th Infantry Brigade Workshop, Royal Electrical and Mechanical Engineers – in the divisional administrative area
Units from the supporting armoured brigade (31 Tank Brigade at Hill 112, usually 8 Armoured Brigade thereafter) would also be attached for specific operations.
Hill 112[]


Troops of 130 Brigade sheltering from mortar fire during Operation Jupiter, 10 July 1944.
130 Brigade was in reserve for the division's first action, Operation Epsom on 26 June,[34] but it was assigned a leading role on 10 July in Operation Jupiter, to take Hill 112. As the divisional historian remarked, the brigade's introduction to battle was 'both bloody and abrupt'.[35] The attack was supported by all the divisional artillery and mortars, plus the artillery of 15th (Scottish) Division and 11th Armoured Division and two Army Groups Royal Artillery (AGRAs). 130 Brigade was to advance through Château de Fontaine to capture Éterville and Maltot and the high ground to the south-east of Hill 112. It was accompanied by Churchill tanks from 9th Royal Tank Regiment (9th RTR), M10 Achilles tank destroyers from 86th (5th Devon) A/T Regiment and Churchill Crocodile flamethrowing tanks from 79th Armoured Division. The advance began at 05.00 and at first the brigade's attack went well, 5th Dorsets and C Squadron, 9th RTR, making good progress against the farms on the lower ground and taking the ruins of Château de Fontaine by 06.15. Brigadier Leslie then launched 4th Dorsets into Éterville. Casualties at first were light and the battalion began to consolidate the position, but a 'grim struggle for the far side of the village then developed'. Meanwhile, 7th Hampshires began the attack on Maltot. They got into the village, but many of the supporting tanks and M10s had been knocked out by crossfire from the uncaptured Hill 112 and from beyond Éterville. The leading Hampshires penetrated the village, leaving strongpoints to be mopped up later by the following Dorsets, but they were driven out by counter-attacks. 4th Dorsets, making their second attack of the day, suffered heavy casualties advancing to reach the isolated Hampshires without artillery support. A troop of towed anti-tank guns of 86th A/T Regiment was brought up to place an anti-tank screen round the south of the village while 4th Dorsets fought to suppress the strongpoints inside the village. The anti-tank troop was overrun by a German counter-attack, and after firing all their small arms ammunition the crews had to remove the breechblocks from their guns and retreat to the infantry's slit trenches. The situation in Maltot became untenable, and the surviving troops were withdrawn. 5th Dorsets and 7th Somerset Light Infantry (SLI) from 214 Brigade had a tough fight until the following morning to maintain the positions round Éterville. The division then had to hold its positions under mortar fire for another 14 days, described by the divisional history as comparable only 'to the bombardment at Passchendaele'. Only on 22 July did a final set-piece attack by 129 Brigade (Operation Express) finally succeed in capturing Maltot.[36][37][38][39]
Mont Pinçon[]
After a short rest 43rd (Wessex) Division moved west to launch an attack towards the dominating height of Mont Pinçon as part of Operation Bluecoat. Starting at 08.00 on 30 July, the division was to force its way through enemy positions at Briquessard and advance through Cahagnes towards Ondefontaine. 130 Brigade led, reinforced by 4th SLI and Sherman tanks of the Sherwood Rangers Yeomanry, followed by the other brigades. Initial casualties were heavy, particularly from mines, and 5th Dorsets attacking on the right soon ran into trouble. On the left 4th Dorsets opened the way for 7th Hampshires to advance on Cahagnes, but it took the accompanying tanks several hours to negotiate the difficult country. The advance achieved only 1,000 yards (910 m) on the first day. and it took until the following morning to clear the mines and restart the advance with 214 Brigade.[40][41][42][43]
The division fought its way forward during the next few days to the foot of Mont Pinçon. 130 Brigade got into Ondefontaine on 3 August, and next day pushed through the woods beyond.[44][45] A new attack was planned for 6 August, with 130 Brigade making a feint to the north, while 129 Brigade continued from the west. During the day 130 Bde made substantial progress, diverting German defenders from the main thrust. It continued next day, while the dominating position of Mont Pinçon fell to a surprise attack, by 129 Bde and its supporting tanks.[46][47][48][49] Having taken Mont Pinçon, 43rd (W) Division participated in the pursuit of the broken enemy, who were soon caught in the Falaise pocket.[50][51] However, the divisional commander, Maj-Gen Ivor Thomas, considered that Brig Leslie was dilatory in attacking on 13 August and sacked him. He was temporarily replaced by the senior battalion commander, Lt-Col Basil Coad ('Daddy Coad') from 5th Dorsets, until Brig. B.B. Walton arrived three days later.[20][52]
Vernon Bridge[]


On 27 August 1944 4th Dorsets cross the Class 9 bridge 'David' at Vernon, decorated with the Wessex Wyvern divisional badge.[53]
After the breakout from the Normandy beachhead, 43rd (W) Division was sent ahead to make an assault crossing of the River Seine at Vernon. US troops had already reached the west bank of the Seine, so the convoys of assault troops and bridging material moving eastwards had to be carefully coordinated to cross with US convoys repositioning to the south. 130 Brigade was in Group 3, a convoy of just over 1000 vehicles including 15th (Kent) GHQ Troops Royal Engineers who were to operate tank rafts and build a heavy Bailey Bridge. The leading group arrived at Vernon on the afternoon of 25 August and began the assault that evening. By 10.00 on 27 August a bridgehead had been secured, the first light bridge (named 'David') was ready, tanks were being ferried across and 130 Bde was assembling in Vernon to be passed across the river when required. The troops in the bridgehead drove off a determined counter-attack, the light bridge (damaged by shellfire) was repaired, and the first 40-ton Bailey ('Goliath') was completed by 19.30. Some of the brigade's troops had already crossed on 'David'; now the rest of the brigade streamed across 'Goliath' and next morning began the breakout. 4th Dorsets cleared the high ground of Germans who had troubled the bridgehead, then 5th Dorsets passed through to capture the villages beyond. 7th Hampshire fought the remains of the defending German battlegroup and captured Tilly. That afternoon, XXX Corps passed through and resumed the pursuit. After the Seine crossing, 43rd (W) Division was 'grounded' while the rest of XXX Corps raced across northern France and Belgium.[54][55][56][57]
Market Garden[]
By the time 43rd (W) Division next moved, the war was already 250 miles (400 km) away. The first element of 130 Bde to move up was 7th Hampshires, sent on 8 September to reinforce the garrison of liberated Brussels. The whole of the brigade was near Brussels by 11 September, and then 43rd (W) Division concentrated at Diest to take part in Operation Market Garden, beginning on 17 September. In 'Garden', the ground part of the operation, XXX Corps was to link river crossings up to the Nederrijn at Arnhem via a 'carpet' of airborne troops. 43rd (W) Division accompanied by 8 Armoured Bde was to follow Guards Armoured Division, carrying out assault crossings if any of the bridges were found to be destroyed, and protecting the 'corridor' to Arnhem. The division waited as the advance got under way, then on 20 September 130 Bde received orders to move up. The advance up the only road ('Club Route') was painfully slow for the infantry, who were being carried in amphibious DUKWs ready for river crossings, and night found the head of the brigade group still at the great bridge at Grave. Next morning 4th Dorsets took over responsibility for the bridges at Grave and Neerbosch while the rest of 130 Bde caught up with the Guards at Nijmegen. There were no Germans left in Nijmegen and by early afternoon 5th Dorsets had established a tight bridgehead on the north bank of the Waal, while 7th Hampshires guarded the south bank. 214 Brigade passed through at dawn next day and followed the Guards who were held up by fierce resistance on 'The Island' between the Waal and the Nederrijn. 130 Brigade was then relieved at Nijmegen and followed up in DUKWs. At Valburg on 23 September its leading battalion, 5th Dorsets, was cut in half by a German tank attack supported by artillery. While the head of the battalion carried on to link up with the Polish Parachute Brigade at Driel, the rest of the brigade had to fight hard to clear Valburg crossroads. When they got through, 4th Dorsets delivered assault boats to the Poles, a few of whom managed to get across the river. On 24 September the decision was made to evacuate the survivors of 1st Airborne Division. That night, under an intense barrage, 4th Dorsets and the Polish crossed the river to establish a new bridgehead from which to carry out the evacuation. The Dorsets' crossing was a disaster; the assault boats were late arriving, the opposite bank was strongly defended and the two leading companies were scattered and destroyed. The rest of the battalion was pinned down, and the DUKWs carrying stores could not mount the river banks. The following night the final evacuation of the airborne bridgehead was carried out by the Royal Engineers, covered by 130 Bde; around 2300 survivors of 1st Airborne and the Poles were ferried back to the south bank; few of 4th Dorsets made it back.[58][59][60][61][62]
In the aftermath of Market Garden, 43rd (W) Division was stationed on The Island, with 130 Bde still in its exposed positions along the Nederrijn, subject to mortar, machine gun and shell fire. On the night of 26/27 September German troops infiltrated the outposts of 43rd (Wessex) Reconnaissance Regiment to the left (west) and a sharp fight broke out. Brig Walton ordered 7th Hampshires to intervene and recapture Randwijk. Heavy losses were sustained among the houses as the battle escalated, but by midday the ad hoc group of units from 43rd (W) Division had eliminated the German bridgehead.[63]
The Germans launched more a serious counter-attack from the east on 1 October, with 116th Panzer Division attacking 130 Bde. 5th Dorsets beat off this attack, but a German party infiltrated into some factory buildings and fortified themselves in brick kilns. 7th Hampshires had to dislodge these troops with the help of RAF Typhoons. On 5 October 43rd (W) handed most of its positions over to the US 101st Airborne Division, but 5th Dorsets had difficulty extricating themselves from their exposed positions round Driel. The battalion left its anti-tank and mortar platoons to help the Americans and fighting continued for another day before the offensive ended. 130 Brigade then relieved the US 82nd Airborne Division on the Groesbeek heights that it had captured during Market Garden. As 43rd (W) Division settled down to hold this static line during the autumn, it rotated its brigades every seven days.[64] Basil Coad was promoted to brigadier and took permanent command of 130 Bde on 7 October.[20]
Dorset Wood[]


Universal Carriers of 43rd (Wessex) Division negotiate a muddy lane during the advance to Geilenkirchen, 18 November 1944.
In November 43rd (W) Division was shifted east for Operation Clipper to capture the Geilenkirchen salient. 130 Brigade's task was to capture Bauchem on the afternoon of 18 November. The village was first subjected to a massive bombardment to protect the flank of 214 Bde attacking Gilrath and Neiderheide, then 130 Bde was due to pass through Gilrath at 15.30 to begin its own attack. The leading battalion, 5th Dorsets, found the village so congested that its supporting tanks from 13th/18th Hussars could not get through. The CO found a route round the village and the attack went in promptly. The battalion took the village and 182 prisoners for just four casualties. However, progress elsewhere was slow on the second day and 130 Bde's attack was cancelled. Instead, 5th Dorsets with the 13th/18th Hussars tanks were tasked with clearing the woods between Tripsrath and Hatterath to secure 214 Bde's position. The battalion advanced under cover of smoke, but once in the woods it was pinned down at a clearing until nightfall when it completed its objectives. The fighting in the woods next day was vicious: once 5th Dorsets reached the edge of the woods they could see the open country behind, but were forced to dig in under heavy fire. Next day the battalion was relieved by 4th Dorsets, who continued the grim defence of what became known as 'Dorset Wood'. Once Geilenkirchen had been captured, 43rd (W) Division then had to defend the ground in conditions resembling the worst of the Western Front in World War I. The division was moved to the Maas as a reserve during the German Ardennes Offensive but was not engaged.[65][66][67]
Roer Triangle[]
43rd (Wessex) Division returned to the offensive in early 1945 in Operation Blackcock to reduce the Roer Triangle. The operation was launched on 16 January and 43rd (W) Division came up on the right of 52nd (Lowland) Division on 20 January. 130 Brigade launched 4th Dorsets at Schier Waldenrath at dawn the next day behind an impressive barrage and carried by Kangaroo Armoured personnel carriers (APCs) of 1st Canadian APC Regiment. Opposition was light, the main problems coming from booby-traps and mines. 5th Dorsets then marched up to relieve 4th SLI at Langbroich while the Kangaroos returned to bring up 7th Hampshires for next day's attack on Waldenrath. The attack by 7th Hampshires on 22 January was a major success: supported by a massive barrage and by Crocodile flamethrowers, the APC-borne infantry swept through Putt and fought their way into Waldenrath, taking 200 prisoners at a cost of 30 casualties. The rest of 43rd (W) Division then continued the advance, though exploitation was prevented by bad weather. 130 Brigade pushed on again on 25 January, but was stopped by ice and mines. The brigade then established defensive positions hidden on reverse slopes and came under the temporary command of 52nd (L) Division from 28 January to 2 February.[20][68][69][70]
Reichswald[]

Shermna tank passing infantry of 43rd Wessex Division on the way to Goch, 17 February 1945.
XXX Corps was next tasked with clearing the Reichswald up to the Rhine as part of Operation Veritable. Five divisions made the initial assault on 8 February, with 43rd (W) Division due to pass through on the second day to capture Goch. Although 15th (S) Division achieved all its objectives on 8 February, the roads collapsed into mud and progress was held up on the second day. By the time 43rd (W) was launched, only one congested road was open through the heavily-bombed town of Kleve, and the whole division was strung out, with 130 Bde still in Nijmegen. It was left as a reserve for 53rd (Welsh) Division, and it was not until 15 February that it got through to join in the fighting. At first light 4th Dorsets in the lead passed through the exhausted 129 Bde and found itself in a fierce fight with fresh German troops. It pushed on slowly until 7th Hampshires took over the lead in the afternoon, followed in turn by 5th Dorsets. 5th Dorsets arrived just as a night counter-attack came in against 7th Hampshires, but put in a fresh attack with tanks at 09.30 next morning, just in time to clear the start line for 214 Bde's follow-up attack. On 17 February 130 Bde cleared Forst Kleve, but there was little opposition after the wood had been blasted by RAF Typhoons and Canadian rocket projectors (the Land mattress). 43rd (W) Division had now 'rolled up' 10 miles (16 km) of the Siegfried Line defences and cleared the escarpment overlooking Goch.[71][72][73][74]
On 20 February 130 Bde was pulled out and sent to relieve a Canadian brigade holding a 'watery wilderness' north of Kleve, where the troops had to be taken in aboard Buffalo amphibious vehicles and contact patrols between the isolated companies had to be carried out by boat. The brigade remained here until 11 March, while the rest of the division completed the advance to Xanten on the Rhine. Contact with the enemy was close, but 130 Bde had no artillery support other than Bofors guns of 110th LAA Regiment firing in a ground role.[75]
Across the Rhine[]
43rd (Wessex) Division was given a follow-up task in the assault crossing of the Rhine (Operation Plunder). 130 Brigade crossed the river in Buffaloes on 25 March behind 51st (Highland) Division, which had carried out the assault on the night of 23/24 March. 5th Dorsets found themselves in immediate combat without time to reconnoitre, but captured Androp with a night attack, allowing the rest of the brigade to clear Millingen next day. The remainder of the division crossed the bridges that had been erected and advanced to the Ijssel. 130 Brigade then retook the lead on 28 March, with 4th Dorsets capturing Landford on the west bank of the Ijssel before nightfall while 7th Hampshire protected the flank. 5th Dorsets then carried out an opposed landing by assault boats in the dark and its pioneer platoon built a light bridge to allow the battalion anti-tank guns to cross. By 08.30 on 29 March the divisional Royal Engineers had completed a Class 40 Bailey Bridge and the pursuit across Germany could begin.[76][77][78]


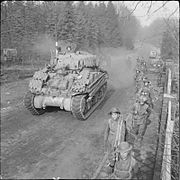
Men of 7th Hampshires advance from Enschede to Hengelo, 3 April 1945.
During the subsequent pursuit, 43rd (Wessex) Division was given the task of opening 'Club Route' for XXX Corps. The division was divided into five battle groups for the first 25 miles (40 km) drive, incorporating units of 8 Armoured Brigade. 130 Brigade constituted the fourth group. The leading group reached the Twente Canal on 2 April, finding the bridges destroyed. 130 Brigade was therefore brought up to make a crossing at Hengelo, with the tanks of the Sherwood Rangers and 12th Battalion King's Royal Rifle Corps (KRRC) attached from 8 Armoured Bde. Rather than a frontal assault, the brigade was sent round to attack from Enschede. The divisional history records that the flank march by cross-country tracks in pouring rain and pitch darkness was a 'remarkable achievement'. At 09.00 next morning 5th Dorsets were launched straight down the road into Hengelo, sweeping aside the resistance while 7th Hampshires enveloped the town from the north. With the canal defences turned, and a bridging site captured, there was no need for an artillery bombardment: the grateful townsfolk later named some of their streets 'Dorset', 'Hampshire' and 'Wessex'.[79]
The pursuit continued through April, 130 Bde with the Sherwood Rangers and 12th KRRC taking the direct road, 'Heart Route' and reaching Löningen on 11 April. Here a deliberate attack had to be made by 4th Dorsets against a company of German officer cadets. Then 7th Hampshires pushed ahead on foot, filling cratered roads as they went. Next day 5th Dorsets and the Sherwood Rangers advanced against rearguards. With several British divisions converging on Bremen 43rd (W) was squeezed out, but 130 Bde continued under the command of 52nd (L) Division, which was now in the lead.[20][78][80] Bremen having ignored a summons to surrender, XXX Corps pushed on into the outskirts, 130 Bde reverting to 43rd (W) Division's command to advance through spasmodic resistance to cut the Hamburg–Bremen Autobahn. Bremen was secured by 28 April and next day XXX Corps continued its drive into the Cuxhaven peninsula. 130 Brigade led 43rd (W) Division, following immediately behind the Reconnaissance Regiment. 5th Dorsets ran into heavy shellfire from the rearguard of 15th Panzergrenadier Division and fighting went on all night. Further progress was hampered. by cratered roads and blown bridges. 130 Brigade had secured a bridgehead over the Hamme Canal on 4 May and the rest of the division was preparing to move on Bremerhaven next day when news arrived of the German surrender at Lüneburg Heath.[81][82][83][84]
After a period as occupation forces in XXX Corps' district, with 130 Bde coming under the temporary command of 51st (H) Division (6–18 May), 43rd (Wessex) Division's HQ and TA units were demobilised at the war's end.[20][21]
Commanders[]
The following officers commanded 130th Infantry Brigade during World War II:[20]
- Brig. H.S.Woodhouse
- Brig. B.K.Young
- Brig. F.Y.C.Knox
- Brig. N.D.Leslie
- Brig. B.B.Walton
- Brig. B.A.Coad
Postwar[]
When the TA was reformed on 1 January 1947, 130 (West Country) Infantry Brigade was reformed in 43rd (Wessex) Infantry Division with the following composition:[85]
- 4th Bn Devons at Exeter
- 5th Bn Devons at Plymouth
- 4th/5th Bn DCLI at Truro[11]
- 4th Bn Dorsets at Dorchester
- 130 Brigade Signals, RCS, at Torquay – became 342 Signal Squadron in 1959[23][86]
On 15 May 1950 all three TA battalions of the Devons merged to form a single 4th Bn, reducing 130 Bde to the normal three-battalion establishment.[10]
In 1961 the division was reduced to a district headquarters as 43rd Division/District, and it was disbanded on the reduction of the TA into the Territorial and Army Volunteer Reserve in 1967.[87][88]
See also[]
- 43rd (Wessex) Infantry Division
- 45th (2nd Wessex) Division for the 2nd Line formation in World War I
- 136th (2/1st Devon and Cornwall) Brigade for the 2nd Line formation in World War I
- 45th Infantry Division (United Kingdom) for the duplicate formation in World War II
- British infantry brigades of the First World War
- British brigades of the Second World War
Footnotes[]
References[]
- ↑ Beckett, pp. 135, 185–7.
- ↑ Dunlop, pp. 60–1; Appendix A.
- ↑ 3.0 3.1 3.2 3.3 3.4 3.5 3.6 3.7 3.8 Army List, various dates.
- ↑ 'Earl of Mount Edgcumbe', Burke's.
- ↑ 5.0 5.1 'Baron Clifford of Chudleigh', Burke's.
- ↑ London Gazette 19 July 1901.
- ↑ London Gazette 8 June 1906.
- ↑ Dunlop, Chapter 14.
- ↑ London Gazette, 15 May 1908.
- ↑ 10.0 10.1 10.2 10.3 10.4 Frederick, pp. 86–7.
- ↑ 11.0 11.1 11.2 11.3 Frederick, pp. 137–8.
- ↑ 12.0 12.1 12.2 12.3 Becke, Pt 2a, pp. 43–8.
- ↑ 13.0 13.1 13.2 13.3 43rd (1st Wessex) Division at Long, Long Trail.
- ↑ Becke, Pt 2b, p. 6.
- ↑ DCLI at Long, Lnng Trail.
- ↑ 16.0 16.1 16.2 Becke, Pt 2a, pp. 55–60.
- ↑ 17.0 17.1 45th (2nd Wessex) Division at Long, Long Trail.
- ↑ Titles and Designations, 1927.
- ↑ Southern Command 3 September 1939 at Patriot Files.
- ↑ 20.0 20.1 20.2 20.3 20.4 20.5 20.6 20.7 Joslen, p. 320.
- ↑ 21.0 21.1 21.2 21.3 Joslen, pp. 69–70.
- ↑ Joslen, pp. 73–4.
- ↑ 23.0 23.1 Lord & Watson, pp. 151–2, 262.
- ↑ Collier, Chapter VII.
- ↑ Collier, Map 5.
- ↑ Collier, Map 6.
- ↑ Collier, Maps 17.
- ↑ Collier, Map 20.
- ↑ Collier, Map 27.
- ↑ Essame, pp. 2–3.
- ↑ Essame, pp. 15–7.
- ↑ Essame, Appendix C.
- ↑ Ford, Appendix 1.
- ↑ Essame, p. 29.
- ↑ Essame, p. 38.
- ↑ Buckley, p. 92.
- ↑ Ellis, Normandy, pp. 317–8.
- ↑ Essame, pp. 37–50.
- ↑ Saunders, Hill 112.
- ↑ Buckley, pp. 153–7.
- ↑ Ellis, Normandy, pp. 388–90.
- ↑ Essame, pp. 53–7.
- ↑ Hunt, pp 29–40, 57–9.
- ↑ Essame, pp. 58–69.
- ↑ Hunt, pp. 61–2, 77–9.
- ↑ Buckley, pp. 167–8.
- ↑ Ellis, Normandy, pp. 409–10.
- ↑ Essame, pp. 67–72.
- ↑ Hunt, pp. 93–130, 139–44.
- ↑ Buckley, pp. 180–1.
- ↑ Essame, pp. 73–89.
- ↑ Christopherson, pp. 418–9.
- ↑ Ford.
- ↑ Buckley, pp. 184–9.
- ↑ Ellis, Normandy, pp. 453–5, 465–6.
- ↑ Essame, pp. 90–111.
- ↑ Ford, pp. 141, 165–6, 176.
- ↑ Buckley, pp. 228–30.
- ↑ Ellis, Germany, pp. 42–3.
- ↑ Essame, pp. 113–38.
- ↑ Horrocks, pp. 221–6.
- ↑ Ryan, pp. 462–5, 477–8, 486, 489, 509–13, 515–31.
- ↑ Essame, pp. 139–43
- ↑ Essame, pp. 144–7, 151–2.
- ↑ Ellis, Germany, p. 161.
- ↑ Essame, pp. 162, 166, 168–76, 182, 187–90.
- ↑ Horrocks, pp. 233–5.
- ↑ Buckley, pp. 265–8.
- ↑ Ellis, Germany, pp. 241–7.
- ↑ Essame, pp. 197–200.
- ↑ Buckley, pp. 274–7.
- ↑ Ellis, Germany, pp. 261–76.
- ↑ Essame, pp. 202–22.
- ↑ Horrocks, pp. 250–5.
- ↑ Essame, pp. 223–4.
- ↑ Ellis, Germany, pp. 293–4.
- ↑ Essame, pp. 233–40.
- ↑ 78.0 78.1 Horrocks, pp. 261–2.
- ↑ Essame, pp. 241–7.
- ↑ Essame, pp. 251–7.
- ↑ Christopherson, pp. 499–500, 504–7.
- ↑ Ellis, Germany, pp. 311–6, 339–40.
- ↑ Essame, pp. 251–70.
- ↑ Horrocks, pp. 262–6.
- ↑ Watson, TA 1947.
- ↑ Lord & Watson, pp. 152, 206.
- ↑ Lord & Watson, p. 152.
- ↑ Watson & Rinaldi, pp. 288–9.
Sources[]
- Maj A.F. Becke,History of the Great War: Order of Battle of Divisions, Part 2a: The Territorial Force Mounted Divisions and the 1st-Line Territorial Force Divisions (42–56), London: HM Stationery Office, 1935/Uckfield: Naval & Military Press, 2007, ISBN 1-847347-39-8.
- Maj A.F. Becke,History of the Great War: Order of Battle of Divisions, Part 2b: The 2nd-Line Territorial Force Divisions (57th–69th), with the Home-Service Divisions (71st–73rd) and 74th and 75th Divisions, London: HM Stationery Office, 1937/Uckfield: Naval & Military Press, 2007, ISBN 1-847347-39-8.
- Ian F.W. Beckett, Riflemen Form: A Study of the Rifle Volunteer Movement 1859–1908, Aldershot: Ogilby Trusts, 1982, ISBN 0 85936 271 X.
- John Buckley, Monty's Men: The British Army and the Liberation of Europe, London: Yale University Press, 2013, ISBN 978-0-300-13449-0.
- Burke's Peerage, Baronetage and Knightage, 100th Edn, London, 1953.
- Stanley Christopherson (James Holland, ed.), An Englishman at War: The Wartime Diaries of Stanley Christopherson, DSO, MC, TD, London: Bantam, 2014, ISBN 978-0593068373.
- Basil Collier, History of the Second World War, United Kingdom Military Series: The Defence of the United Kingdom, London: HM Stationery Office, 1957/Uckfield: Naval & Military, 2004, ISBN 978-1-84574-055-9.
- Col John K. Dunlop, The Development of the British Army 1899–1914, London: Methuen, 1938.
- Maj L.F. Ellis, History of the Second World War, United Kingdom Military Series: Victory in the West, Vol I: The Battle of Normandy, London: HM Stationery Office, 1962/Uckfield: Naval & Military, 2004, ISBN 1-845740-58-0.
- Maj L.F. Ellis, History of the Second World War, United Kingdom Military Series: Victory in the West, Vol II: The Defeat of Germany, London: HM Stationery Office, 1968/Uckfield: Naval & Military, 2004, ISBN 1-845740-59-9.
- Maj-Gen H. Essame, The 43rd Wessex Division at War 1944–45, London: William Clowes, 1952.
- Lt-Gen Sir Brian Horrocks, A Full Life, London: Collins, 1960.
- Eric Hunt, 'Battleground Europe: Normandy: Mont Pinçon, Barnsley: Leo Cooper, 2003, ISBN 0-85052-944-1.
- Lt-Col H.F. Joslen, Orders of Battle, United Kingdom and Colonial Formations and Units in the Second World War, 1939–1945, London: HM Stationery Office, 1960/Uckfield: Naval & Military Press, 2003, ISBN 1-843424-74-6.
- Cliff Lord & Graham Watson, Royal Corps of Signals: Unit Histories of the Corps (1920–2001) and its Antecedents, Solihull: Helion, 2003, ISBN 1-874622-92-2.
- Cornelius Ryan, A Bridge Too Far, London: Hamish Hamilton, 1974/Coronet 1975, ISBN 0-340-19941-5.
- Tim Saunders, Battleground Europe: Normandy: Hill 112, Battles of the Odon – 1944, Barnsley: Pen & Sword, 2000, ISBN 978-0-85052-737-7.
- Titles and Designations of Formations and Units of the Territorial Army, London: War Office, 7 November 1927.
External sources[]
The original article can be found at 130th Infantry Brigade (United Kingdom) and the edit history here.